
This article covers a step-by-step guide to Printing Items to a Different Course via SmartPOS.
There may be instances where an Operator will want a Product that would normally Print with Course 2 to Print with Course 1 instead, vice versa, or another Course, etc. For example, a guest orders a pizza that is set as a 3rd Course item, but they would like it as their 1st Course.
This Table Till Function allows the Operator to alter the Course that a highlighted Product will Print with. This Till Function button can be configured to prompt the Operator to select the desired Course, or it can be preset via BackOffice; in the example in this, it is the former.
Prerequisites
- To access Pricing Features, the applicable Operator Privileges
-
Operator Maintenance 'Till Privileges' Tab - General: "Operate Tills" Flag
- Tables: "Table Sales" Flag
How-to Guide
- When the Operator is taking the Table's order, they will need to highlight the desired Product and then tap the Print With Other Course Till Function button
- The Till Function button can have a different Name as the display name can be easily modified from BackOffice
- A window will open prompting the Operator to select the desired Course for the Product to be Printed with
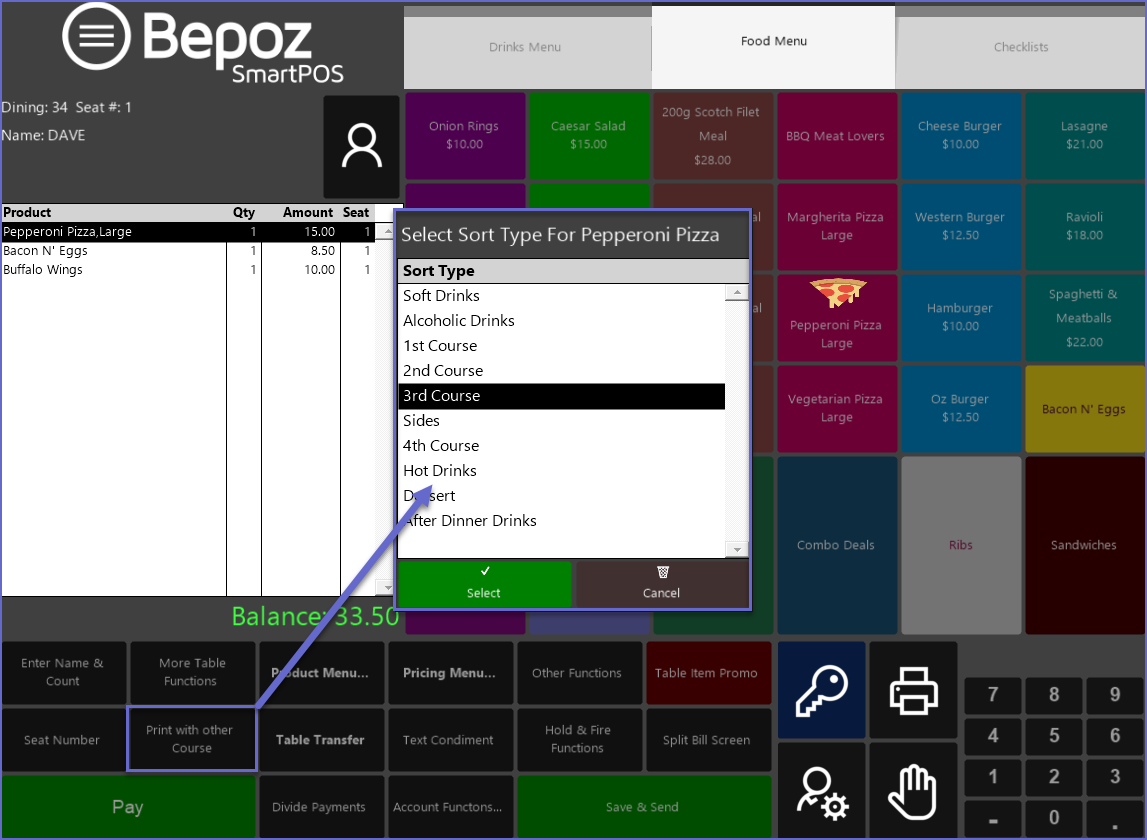
- This Function must be performed when the Product is first selected, prior to the Table being Saved
- After the Course has been selected, a confirmation prompt will appear
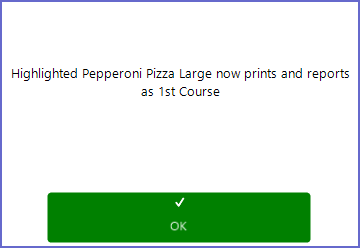
- This will change the Product Course for that particular Transaction only and in order to change the Product's Sort permanently, the change has to be made from BackOffice Product Maintenance