9 | ResDiary Table Transfers via SmartPOS
This article explains the process of transferring ResDiary Tables via SmartPOS.
This article explains the process of transferring ResDiary Tables via SmartPOS.
Prerequisites
- To access ResDiary Till Function Settings, the applicable Operator Privileges will need to be enabled
-
General Tab - Sales Reports Flags
-
Reporting Tab - Sales Reports Flags
ResDiary Table Transfers via SmartPOS
- This functionality provides Operators with the ability to
Transfer ResDiary Tables without using the ResDiary website; i.e., ResDiary Tables can be transferred directly in SmartPOS
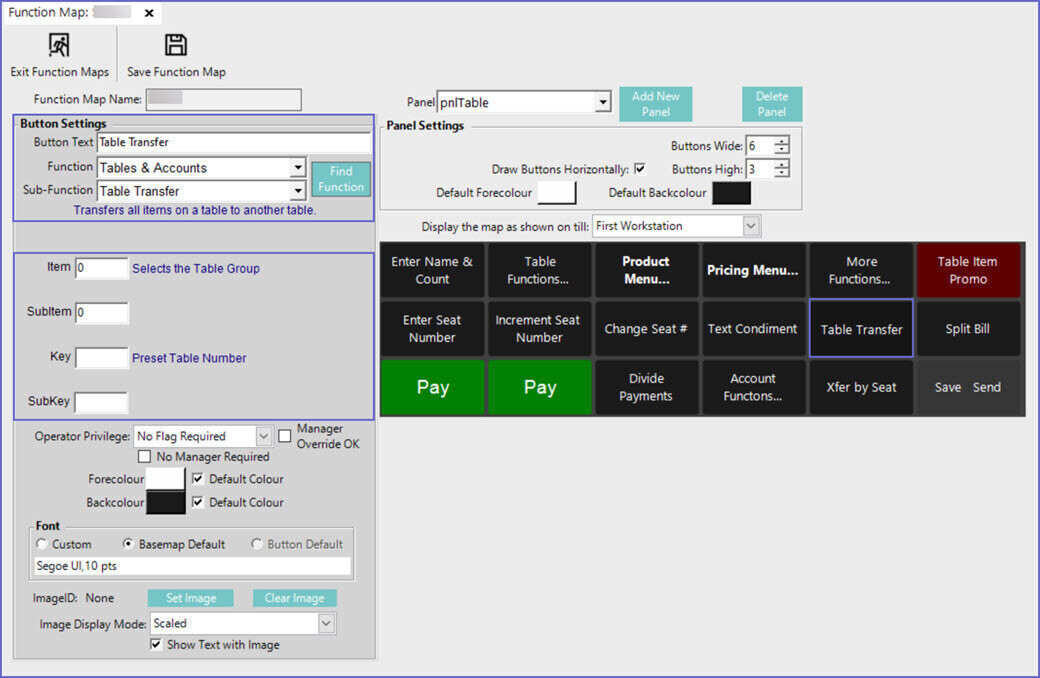
"Table Transfer" Till Function Configuration
- When Transferring ResDiary Tables in Bepoz, the Table Transfer Function button must be configured with the same Table Group that is being used by ResDiary; i.e., the same Table Group that's configured on the ResDiary Till Extension and ResDiary Transaction Queue

Transfer ResDiary Table SmartPOS Workflows
- When Transferring ResDiary Tables via SmartPOS, there are couple different possible workflows and different outcomes depending on the Table that the Operator Transfers (or attempts to Transfer) to
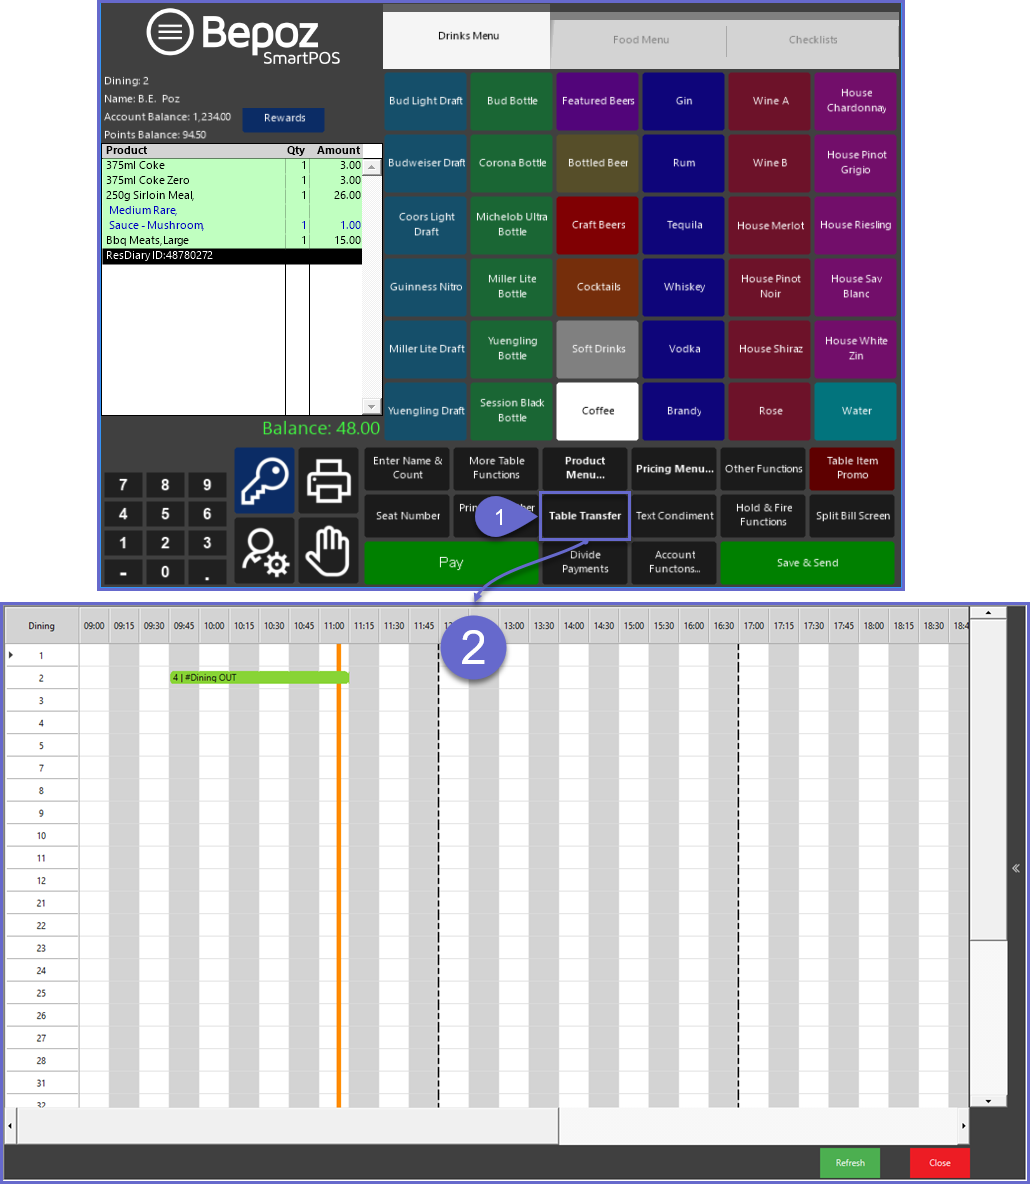
- To begin, with the ResDiary Table open, tap on the Table Transfer function button
- The Table Booking Grid will open with 2 different options for completing the Table Transfer; the Table being Transferred will be labeled "#Dining OUT"
- From the Booking Grid, Operators can tap the chevron icon on the right side of the screen to expand the pop-out panel and then choose a suitable Table from the "Next Free Tables" options which are retrieved from ResDiary
- Optionally, Operators can manually select any available Table from the Grid by tapping on the desired Table's line

Transferring to a Next Free Table
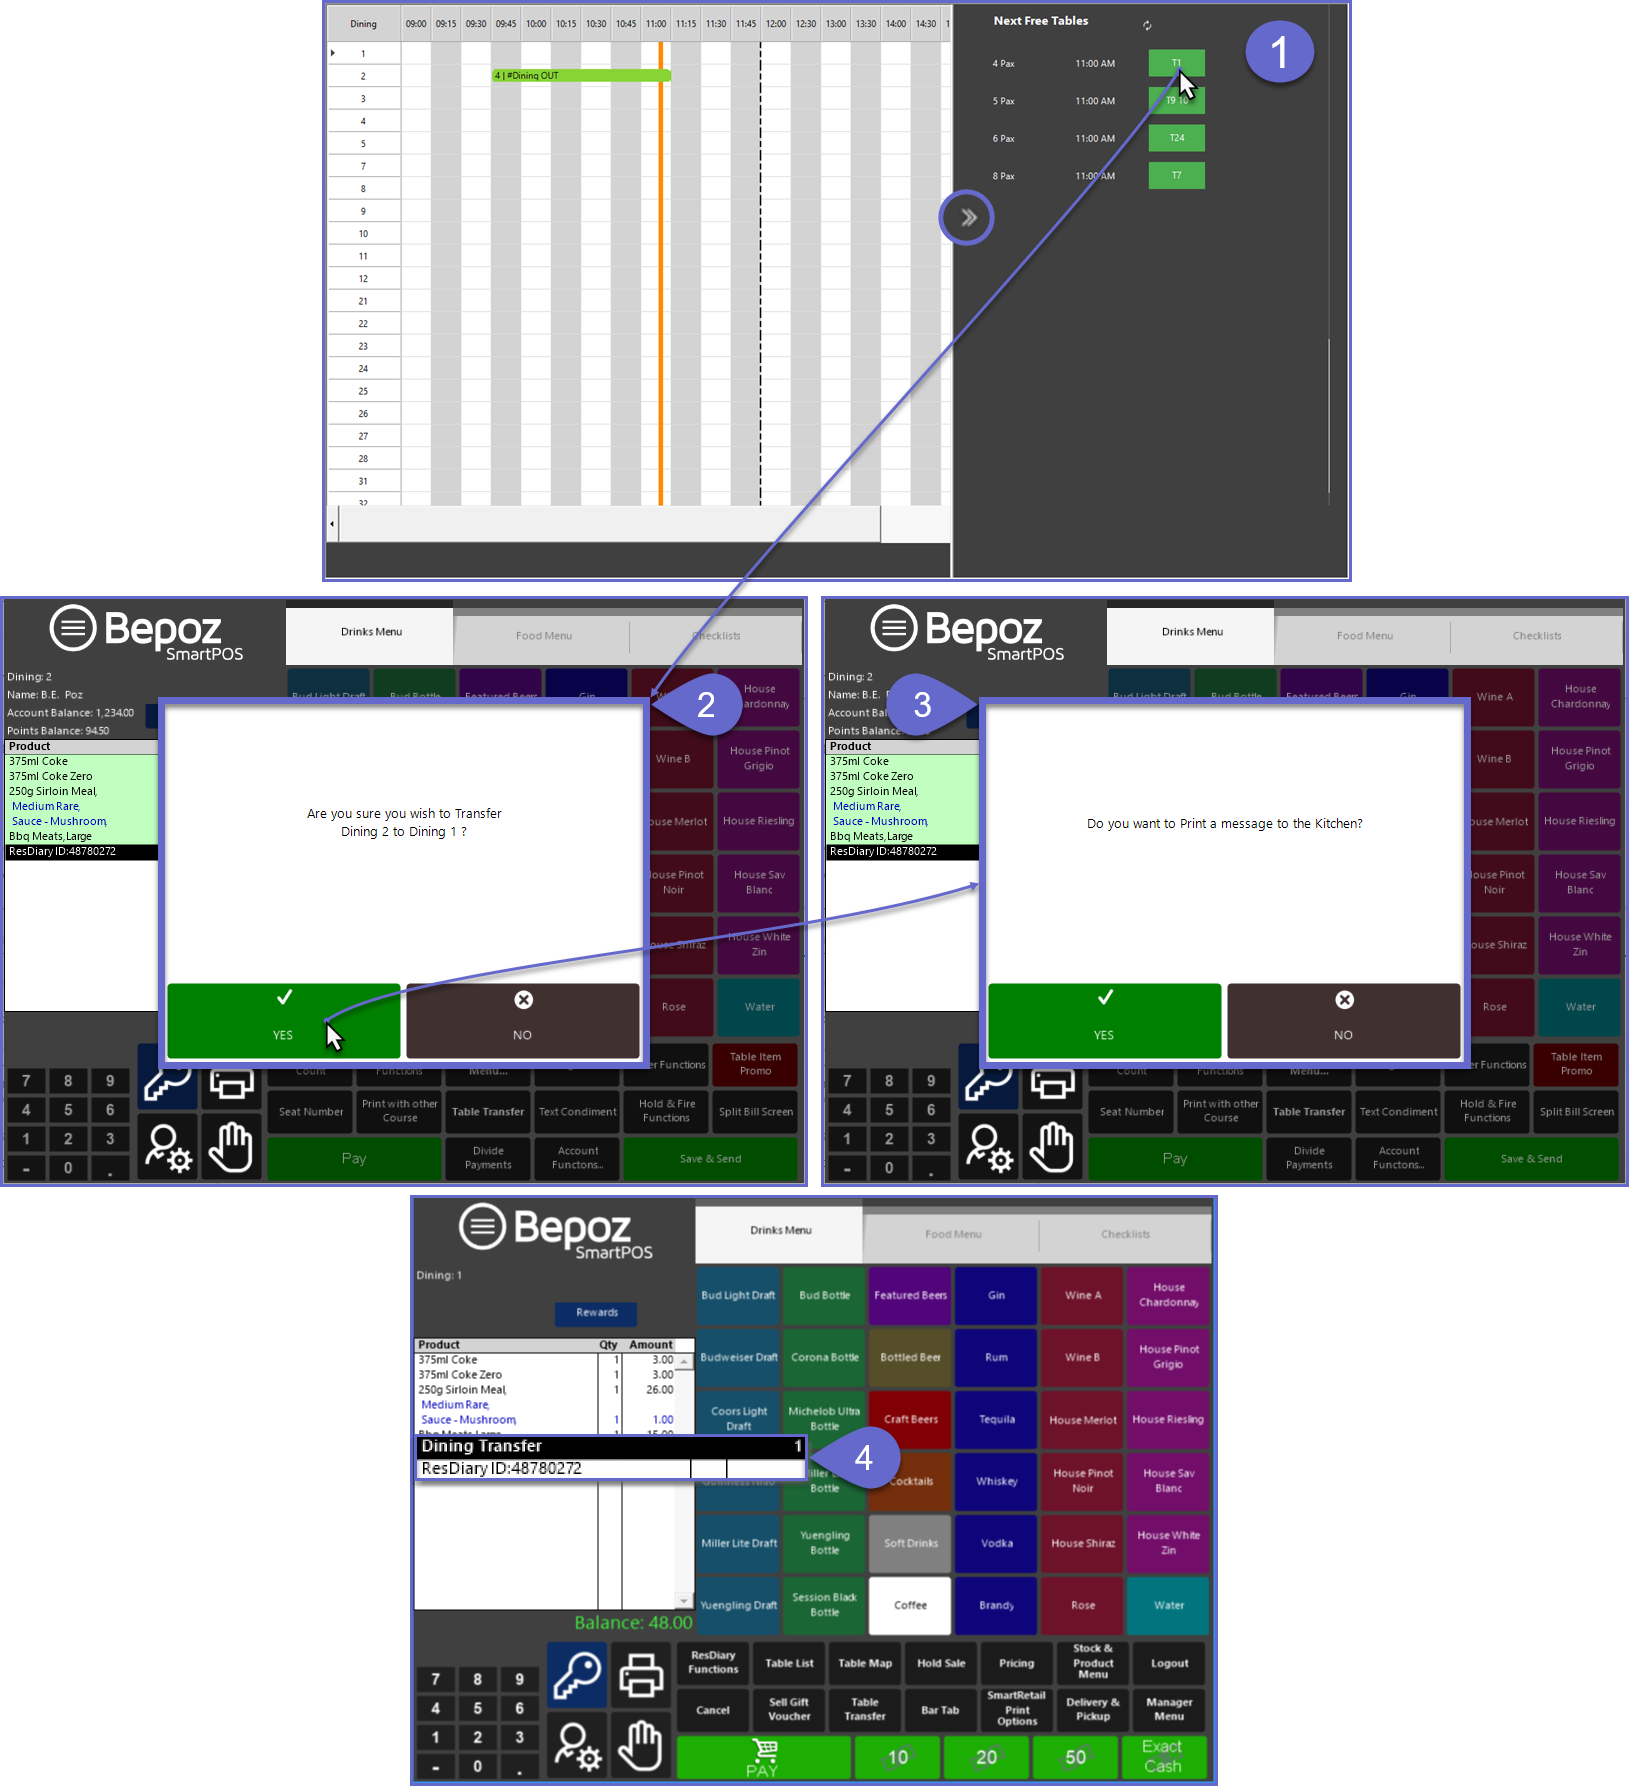
- After expanding out the pop-out panel, select the desired Table from the list of available Next Free Tables
- After selecting one of the Next Free Tables, the Operator will first be asked to confirm the Transfer
- If Yes is selected to confirm the Transfer, a prompt will appear on screen asking if the Operator would like to Print a message to the Kitchen notifying of the Transfer
- Lastly, the Transfer will be completed which can be confirmed by the Transfer line in the Transaction Window

Transferring Manually to any Available Table
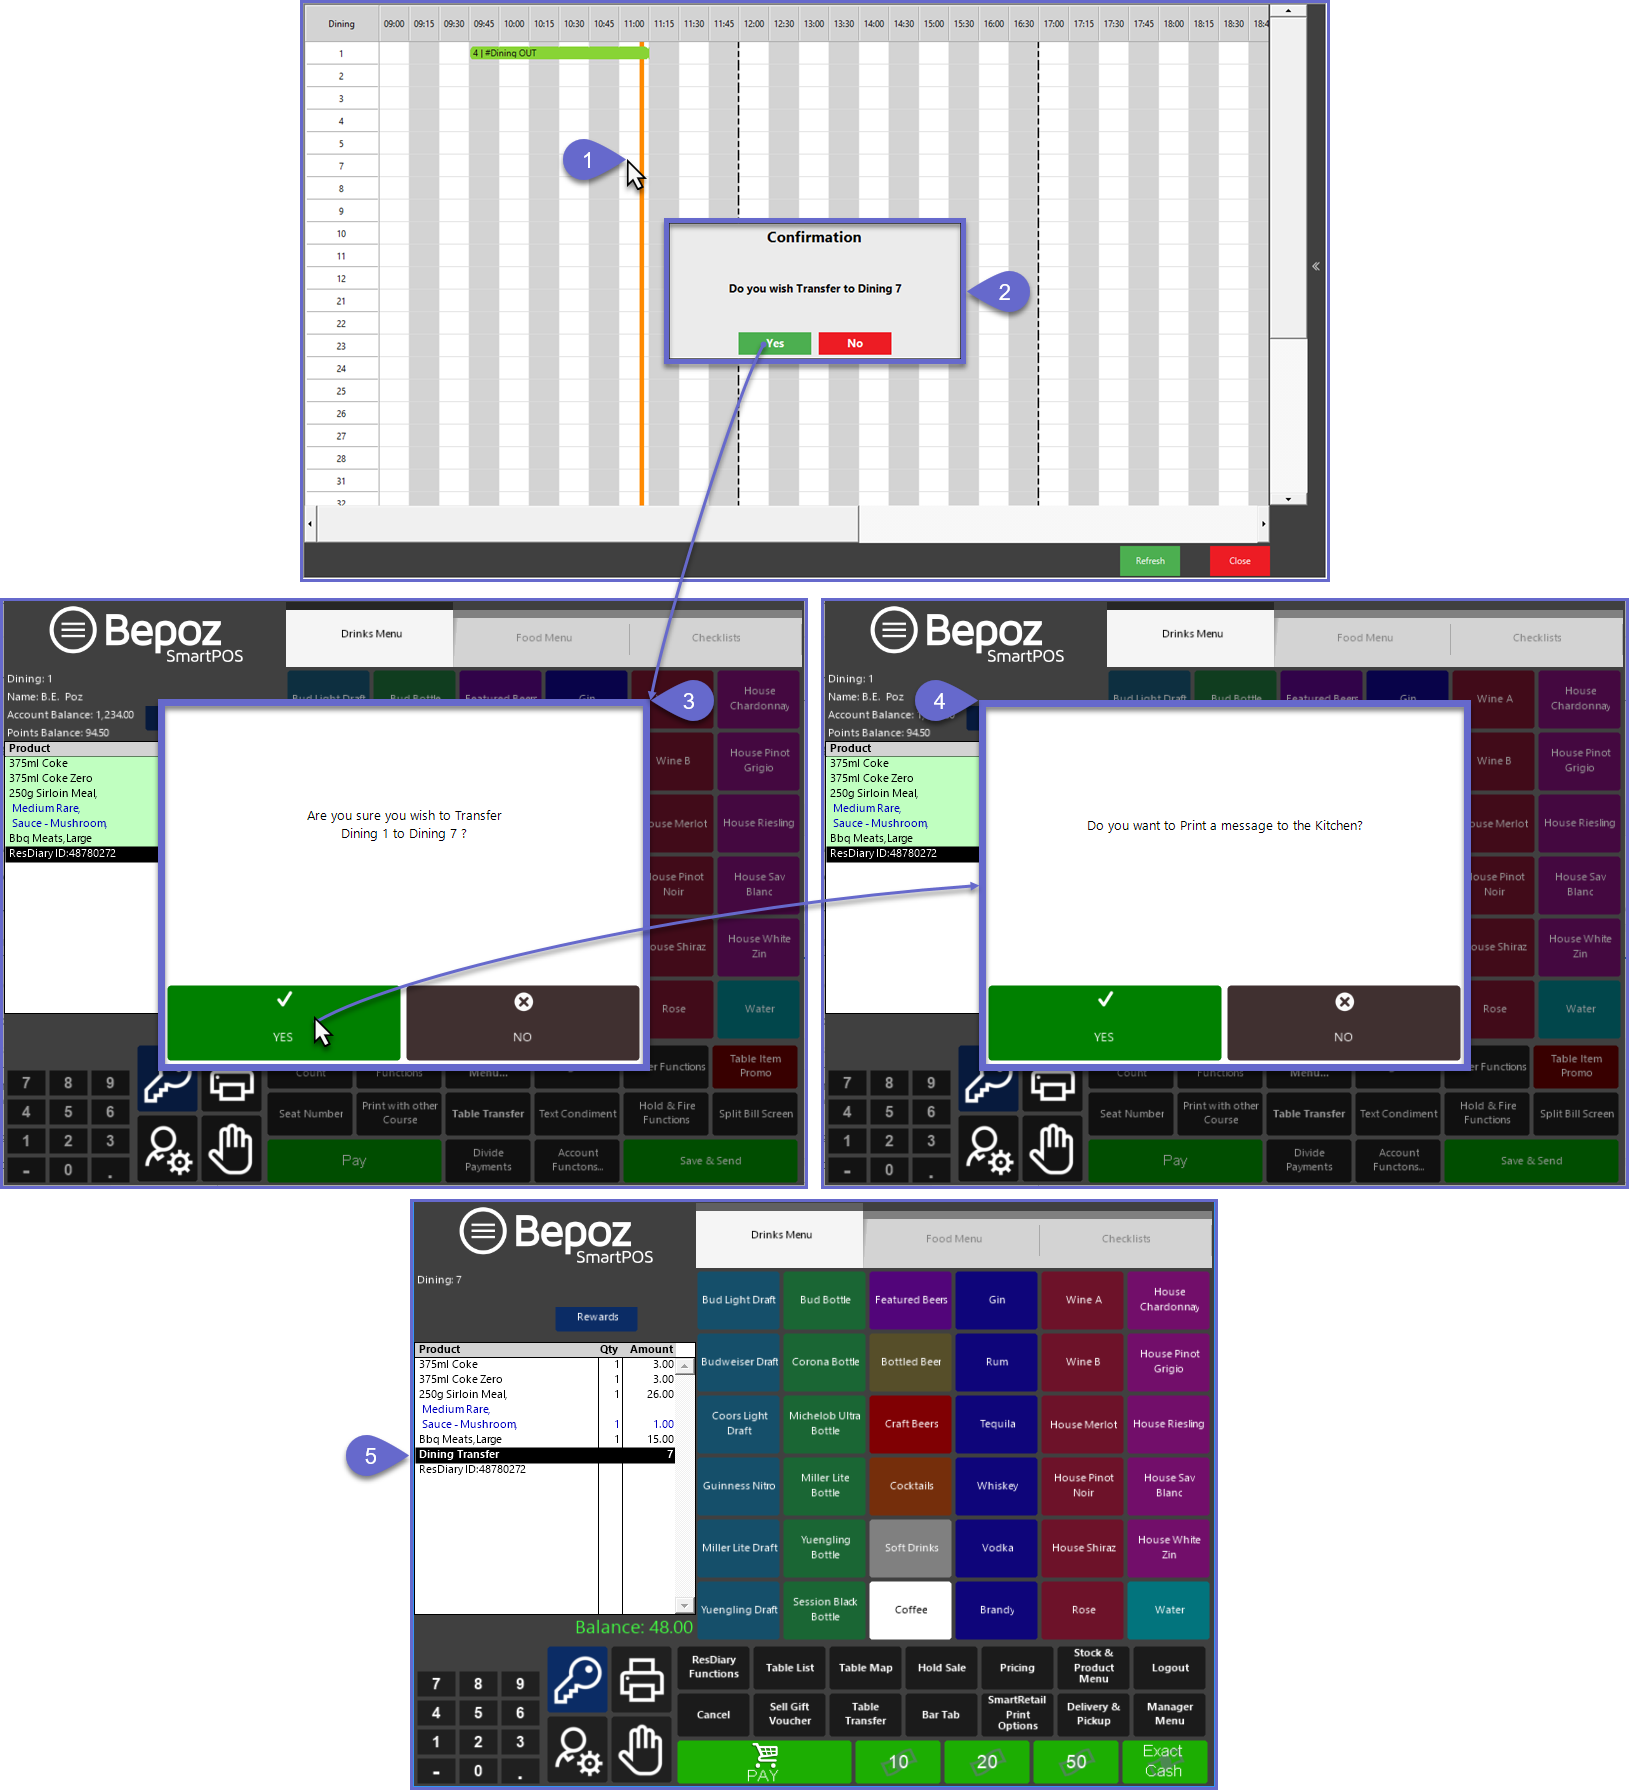
- To Transfer Manually, first select the available Table from the Grid by tapping on the Table's line
- In this example, the Table is being Transferred to another Table with no overlapping Booking in terms of Time Duration; i.e. the Transfer Out table is Booked through 8:00 PM, but the Table being Transferred to has a Booking starting at 7:30 PM
- If the Table is being Transferred to a Table that has an overlapping Booking, the overlapped Booking will automatically be moved to the Next Free Table
- A prompt will appear on the Grid to confirm the Transfer
- The Grid will close and return to SmartPOS where a 2nd prompt will confirm the Transfer
- If Yes is selected to confirm the Transfer, a prompt will appear on screen asking if the Operator would like to Print a message to the Kitchen notifying of the Transfer
- Lastly, the Transfer will be completed which can be confirmed by the Transfer line in the Transaction Window

