
✅ Prerequisites
-
Minimum Version: SmartPOS version 4.8.1.0 or higher
-
Operator Privileges:
-
Till Privileges → “Operate Tills” flag
-
📖 Overview
The Transfer by Seat function allows operators to quickly move items assigned to a specific seat to a new or existing split. This is managed via the ‘Split Xfer Seat’ function button, which can be configured in two different modes:
-
Item = 0 → Automatic split creation by seat number
-
Item = 1 → Manual seat and split selection
⚙️ Configuration Options
Function Button Setup
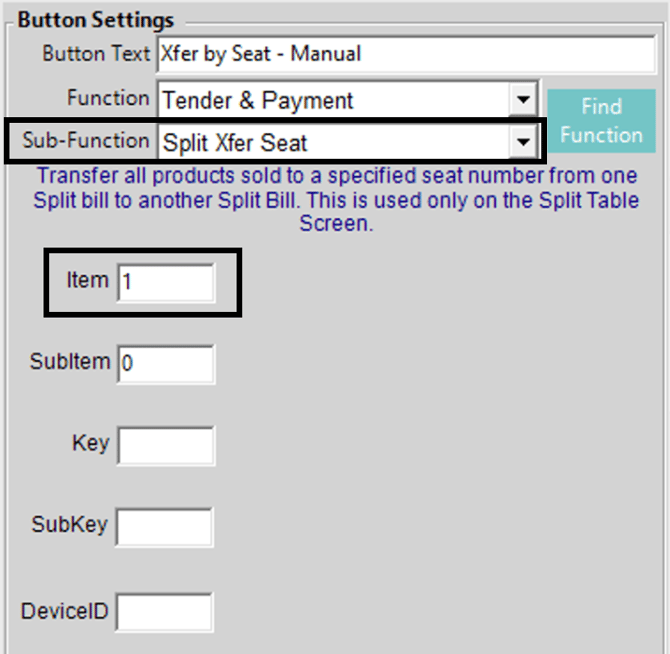
When adding the ‘Split Xfer Seat’ function button in BackOffice:
-
Function: Tender and Payment
-
Sub-function: Split Transfer Seat
-
Item Value:
-
0 → Auto-create splits for each seat (automatic mode)
-
1 → Manual entry of seat and split numbers (manual mode)
-
🖥 SmartPOS Workflow
Item = 0 (Automatic Mode)
-
From the active table, tap ‘Split Xfer Seat’.
-
SmartPOS will:
-
Identify all unique seat numbers in the Base Split (or Split 1 if Base Split is hidden)
-
Create a corresponding split for each seat number
-
Transfer all items from each seat to its matching split
-
-
This works from any split:
-
Select the source split
-
Tap ‘Split Xfer Seat’ to repeat the process
-
💡 Use Case Example: Automatically splitting a large party’s bill into separate splits by seat for quick individual payments.
Item = 1 (Manual)
-
Tap ‘Split Xfer Seat’.
-
SmartPOS prompts for:
-
Seat Number → the position whose items will be transferred
-
Split Number → target split (enter “0” to create a new split)
-
-
If the entered split does not exist:
-
SmartPOS prompts: "Create new split?"
-
On confirmation, a new split is generated (system assigns next available number)
-
-
SmartPOS transfers all items for that seat to the specified split.