Overview
Printer Profiles can be set to define where a Product will print to when its sold.
Prerequisites
- Operator Privilege to access BackOffice
- Operator Privilege to Access Venue, Stores & Tills
- Operator Privilege to Maintain Venue, Stores &Tills
- Operator Privilege to Maintain Printer Profiles
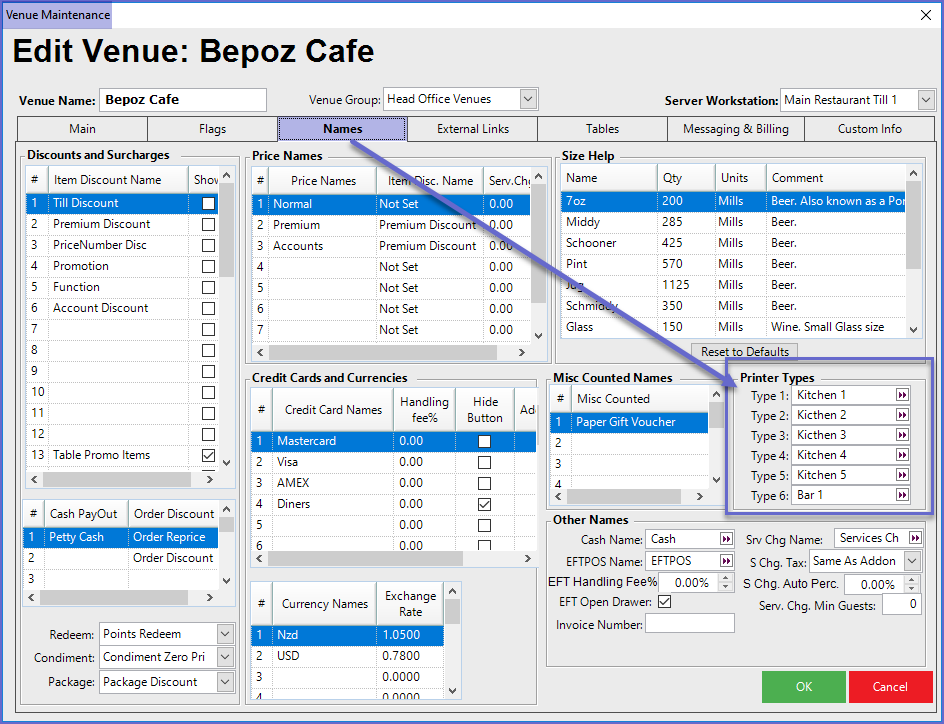
- To create Printer Profiles, the Printer Types must first be defined in Venue Settings
- To do so, go to BackOffice > System Setup > Venue, Stores, & Tills > Venue Maintenance
- Under the Names tab, define the six (6) Printer Types
Adding a Printer Profile to Products
Bepoz BackOffice provides four (4) options to add the Printer Profiles to Products which are shown below:
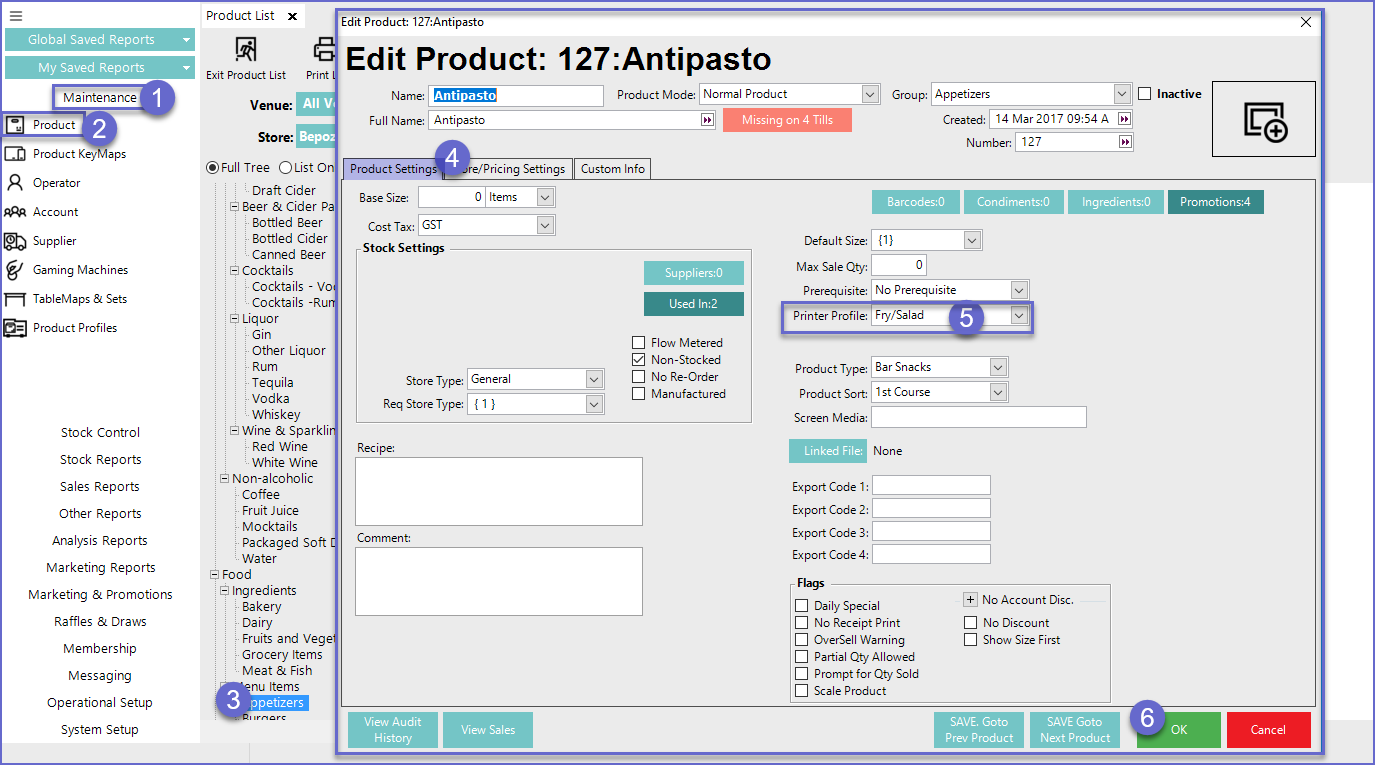
Option 1 - Product Settings
- Go to Product Maintenance option (1 & 2) from the Side Menu
- Select a Product (3) and navigate to the Product Settings tab (4)
- Select a Printer Profile from the Printer Profile Drop-down list (5) and Press 'OK' (6)
- This will be the default Printer Profile for the Product
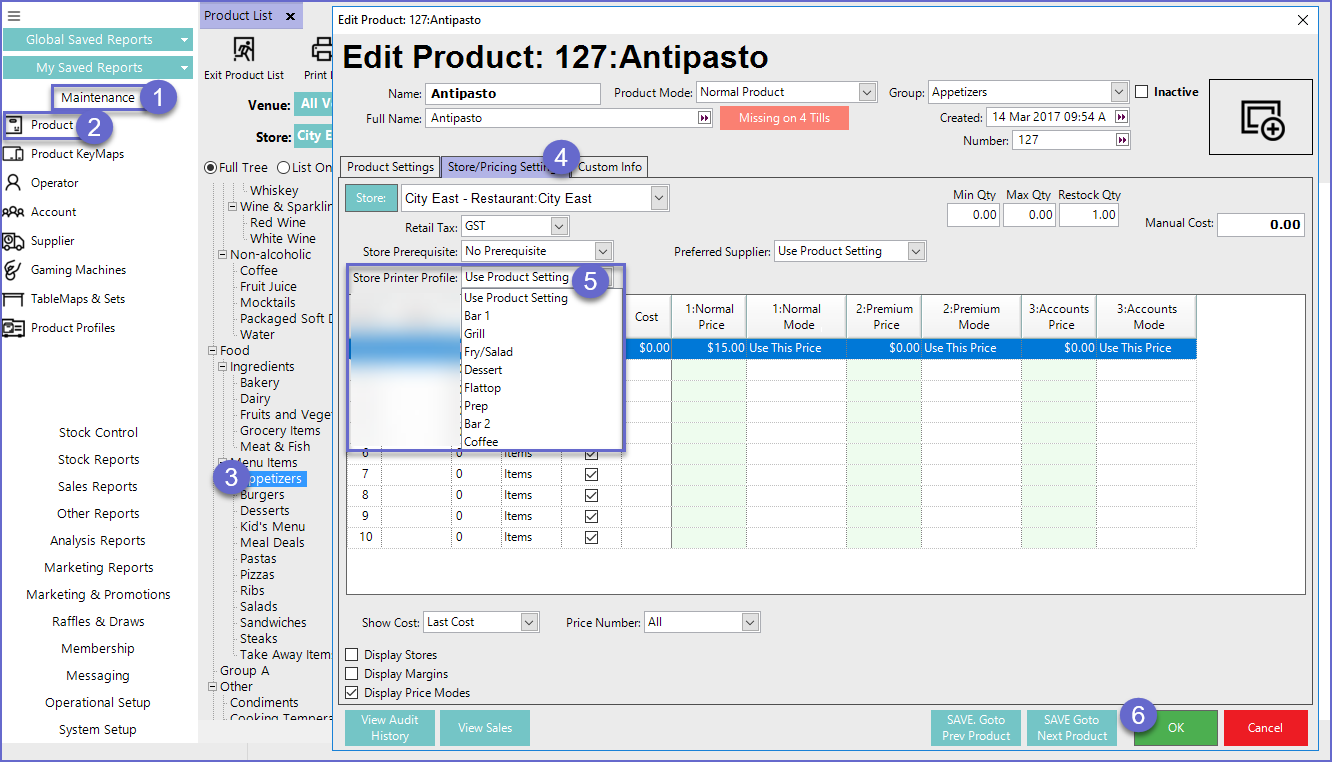
Option 2 - Product Store Settings
- Go to Product Maintenance option (1 & 2) from the Side Menu
- Select a Product (3) and navigate to the Store/Pricing Settings tab; select the desired Store from the drop-down (4)
- Select a Printer Profile from the Printer Profile Drop-down list (5) and Press 'OK' (6)
- This allows for having varying Printer Profiles between Stores and will override the Printer Profile setting from the Product Settings tab for the Prod Store selected
Option 3 - Product Change by Range
- Go to Product Maintenance option (1 & 2) from the Side Menu
- Right Click a Product Group (3) and select 'Product Change by Range' option (4)
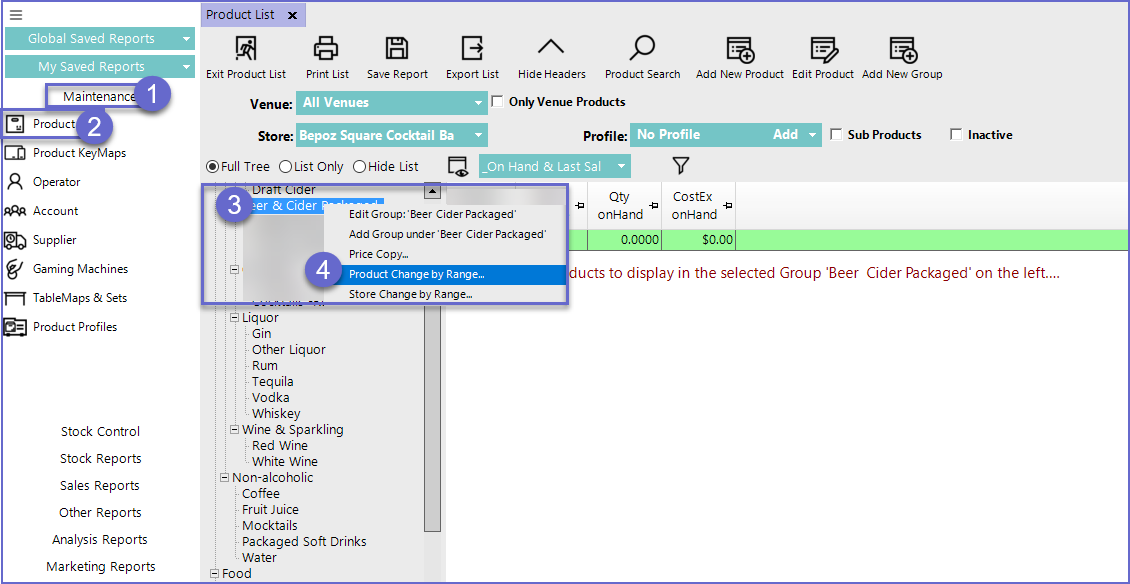
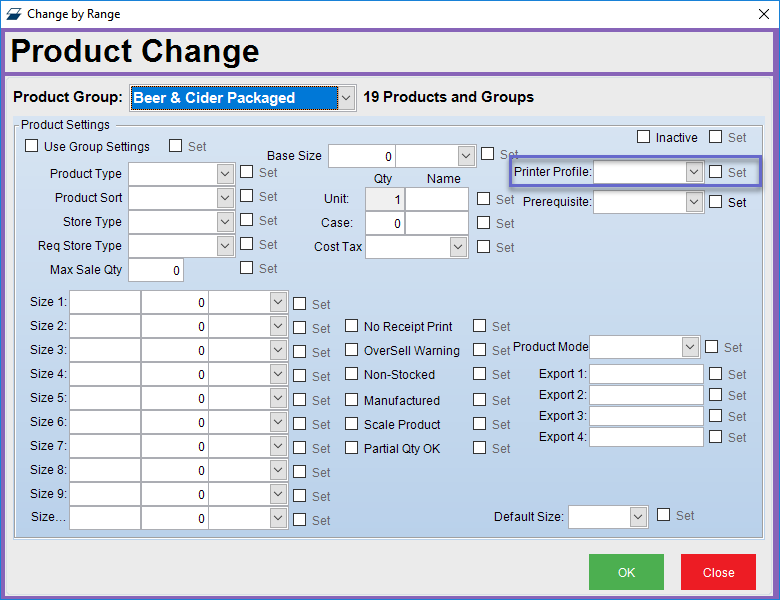
- This will open a 'Change by Range' window for Product Change from where Printer Profile can be selected for the entire range
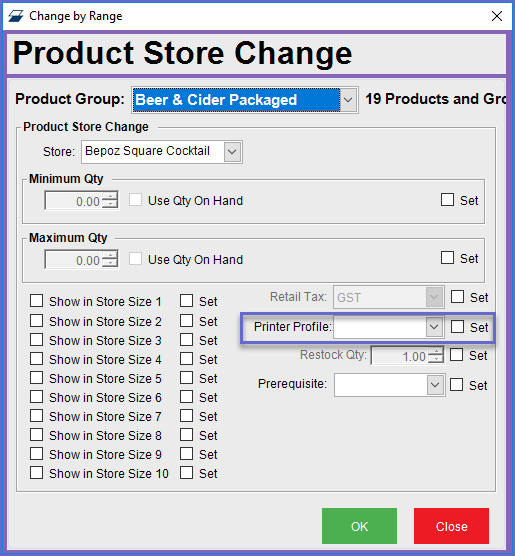
Option 4 - Store Change by Range
- Go to Product Maintenance option (1 &2) from the Side Menu
- Right Click a Product Group (3) and select 'Store Change by Range' option (4)
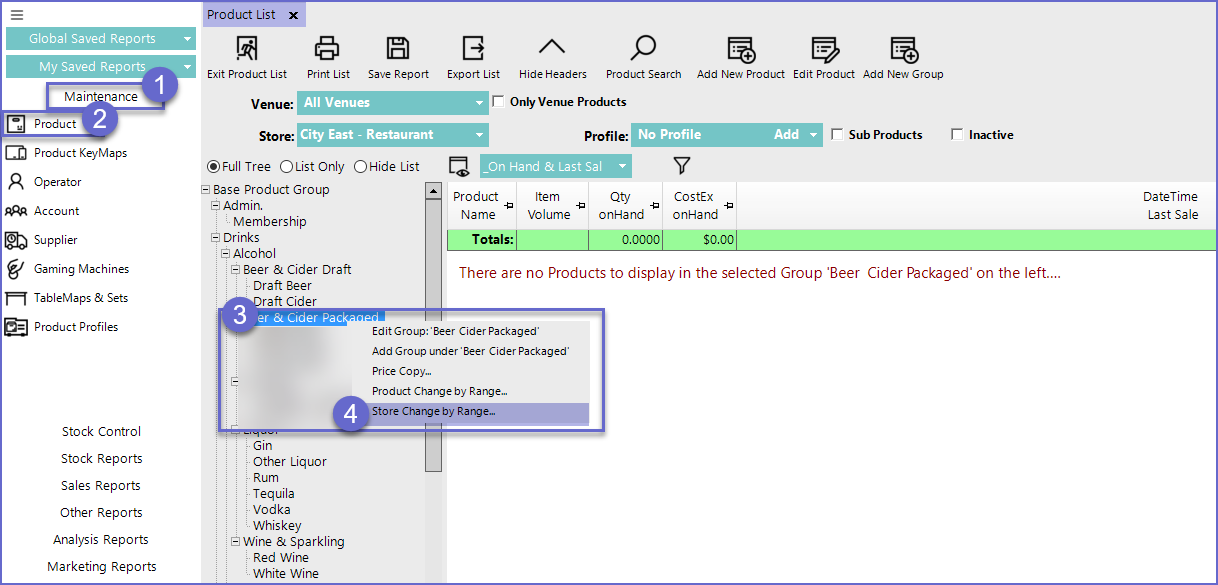
- This will open a 'Change by Range' window for Product Store Change from where printer profile can be selected for the entire range