
Overview
A Report can be built in various Maintenance, Stock Control, Marketing & Promotions, Raffles & Draws, Memberships, and Messaging components by selecting from available fields, drop-down options, and views.
Reports can also be built by customizing default reports within Stock Reports, Sales Reports, Analysis Reports, and Other Reports.
Building & Saving A New Report
-
By configuring and combining drop-down options such as Venues, Stores, Profiles, Periods, Views, etc. and a Filter - this allows an enormous variety of options for saving all sorts of reports
-
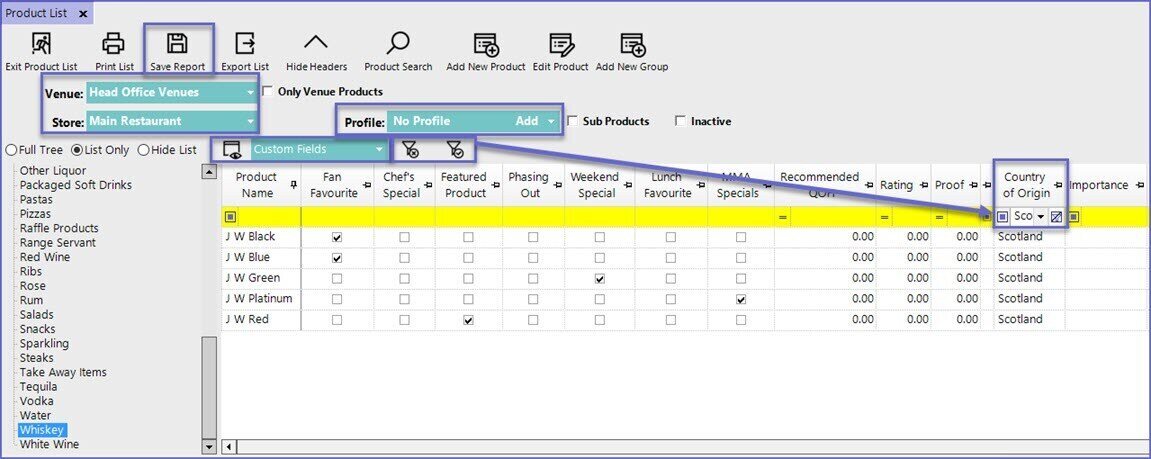
For example, if the following Report is saved, anytime the Saved Report is run, it will display Products belonging to the Product Group called "Whiskey" within the selected Store of the selected Venue which meet "No Profile"; and, it will show the information contained in the View called "Custom Fields" and the Products filtered where "Scotland" equals the text in the Custom Field called "Country of Origin"
-
To Save a Report, click on the Save Report button, which can be found in the header section of many BackOffice components
-
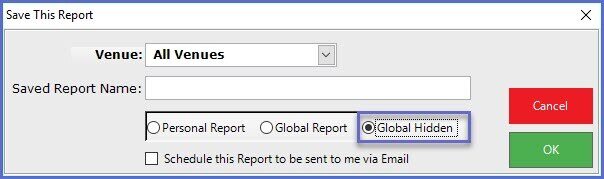
When saving the Report, it is recommended to save as a Global Hidden Report so as to prevent having an excess of Reports displaying in Global Saved Reports or My Saved Reports
To add a saved report onto the Report Wizard; log in to Backoffice and follow these steps
-
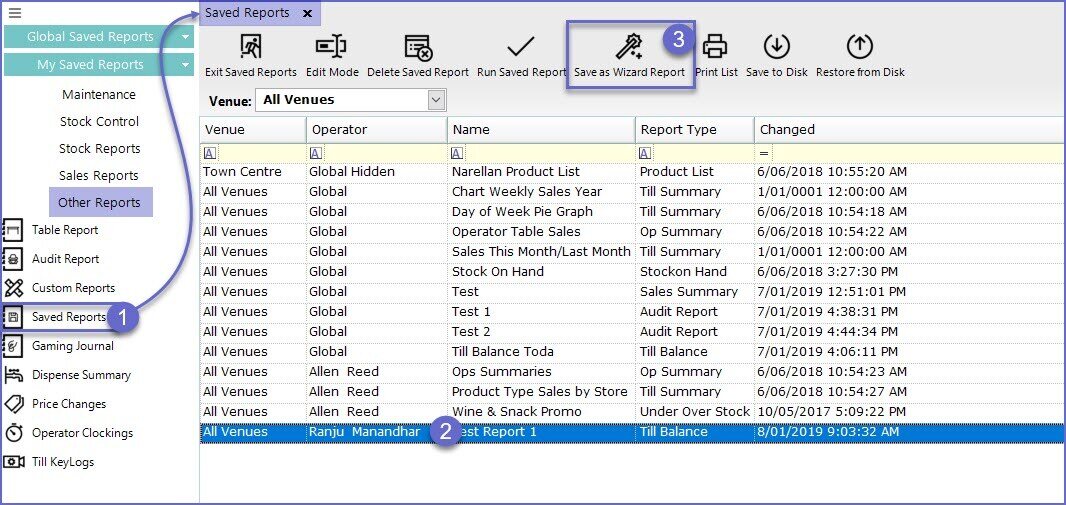
Go to Other Reports > Saved Reports
-
All Saved Reports that an Operator has privileges granted to view will be displayed, whether it had been marked as Global Hidden, Global Report, or Personal Report
-
Select the report to be added to the Report Wizard
-
Click the 'Save as Report Wizard' option from the Menu bar at the top
-
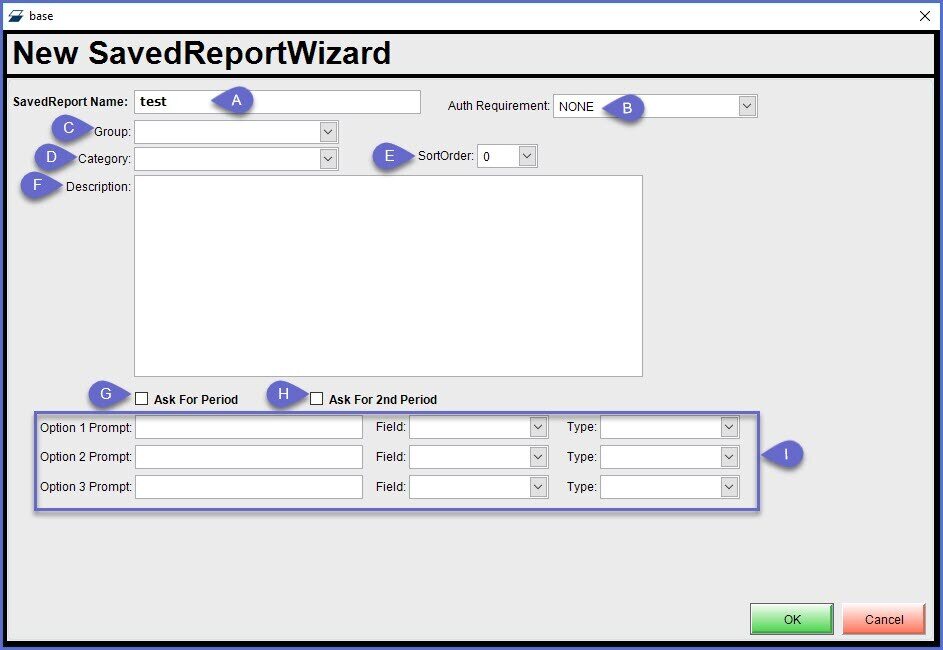
This will open a New Saved Report Wizard window where the operators can configure how and where the report will appear in the reporting wizard along with other Reporting options when that Report is selected from Report Wizard
Prompt Options
Option 1 Prompt
-
Enter the prompt text message that will be presented to the Operator
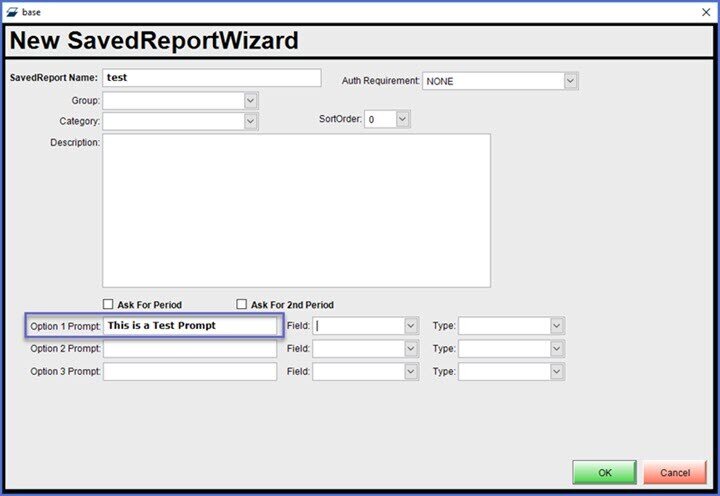
Field
- Select the actual screen field that the option is for

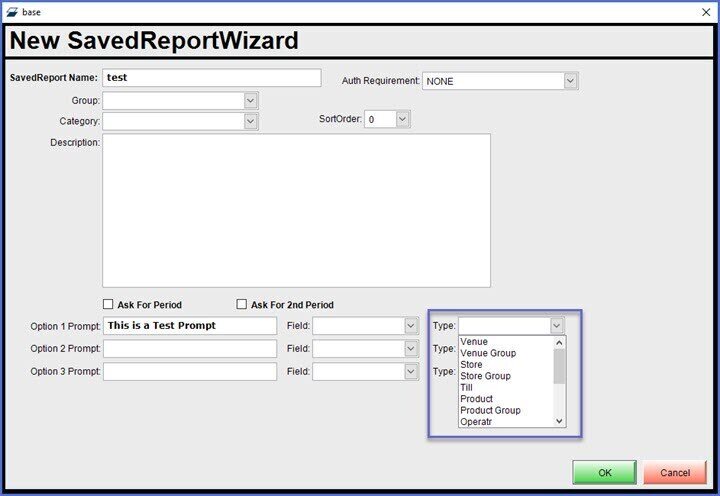
Type
- Select the type of Data to be prompted to the Operator
Result
- The options configured in the above images will prompt the Operator to select a Venue prior to the Report being run
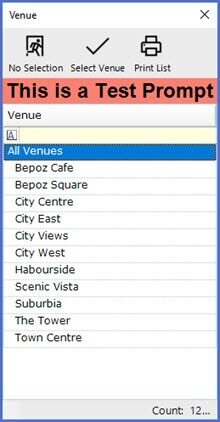
- Bepoz allows for each report to have up to three option prompts as well as the Ask For Period flags
- If the operator has to make multiple option selections, a prompt similar to below will be displayed
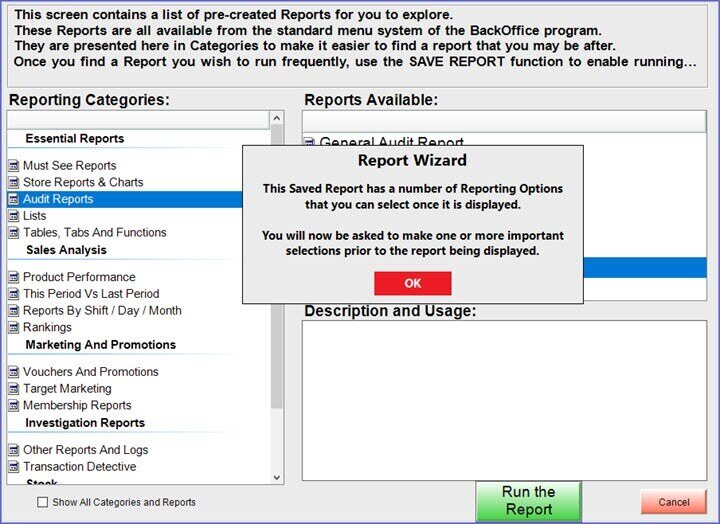
Creating a New Report Wizard Entry
-
Report Wizard can be customized beyond the default Groups, Categories, and Reports by adding Saved Reports to the Report Wizard
- This can be a very convenient way to organize and access important/favorite Reports
- A Report will first need to be created and Saved in order to add it as a new entry in Report Wizard
- Any feasible Report can be added to Report Wizard after it has been added to Saved Reports.
Video Walkthrough