📄Check Stock Interface
This article explains the procedure for implementing the Bepoz interface to the stock system called Check.
Overview
Bepoz exports sales data to Check on a daily basis - after the new day starts, for the previous day(s).
Check then processes this information to update its Quantity On Hand.
Bepoz only sends Sales Data; no Transfers or Stock Losses or other Stock Adjustments are sent.
This is done using a Stock Report which is exported via a BackOffice Extension.
Check will then create a Bepoz Product Import file to update the Bepoz Quantity on Hand and Costs which is implemented as a Scheduled Job in Bepoz.
Prerequisites
- To begin the implementation process, the Implementation Operator must have the following privileges enabled:
- Ability to use BackOffice
- Access to & maintenance of Scheduled Jobs
- Access to & maintenance of Venue, Stores & Tills
Scheduled Job
- The Check interface comprises a Bepoz Scheduled Job that creates an export file that is then picked up by Check.
- This Scheduled Job is recommended to run daily.
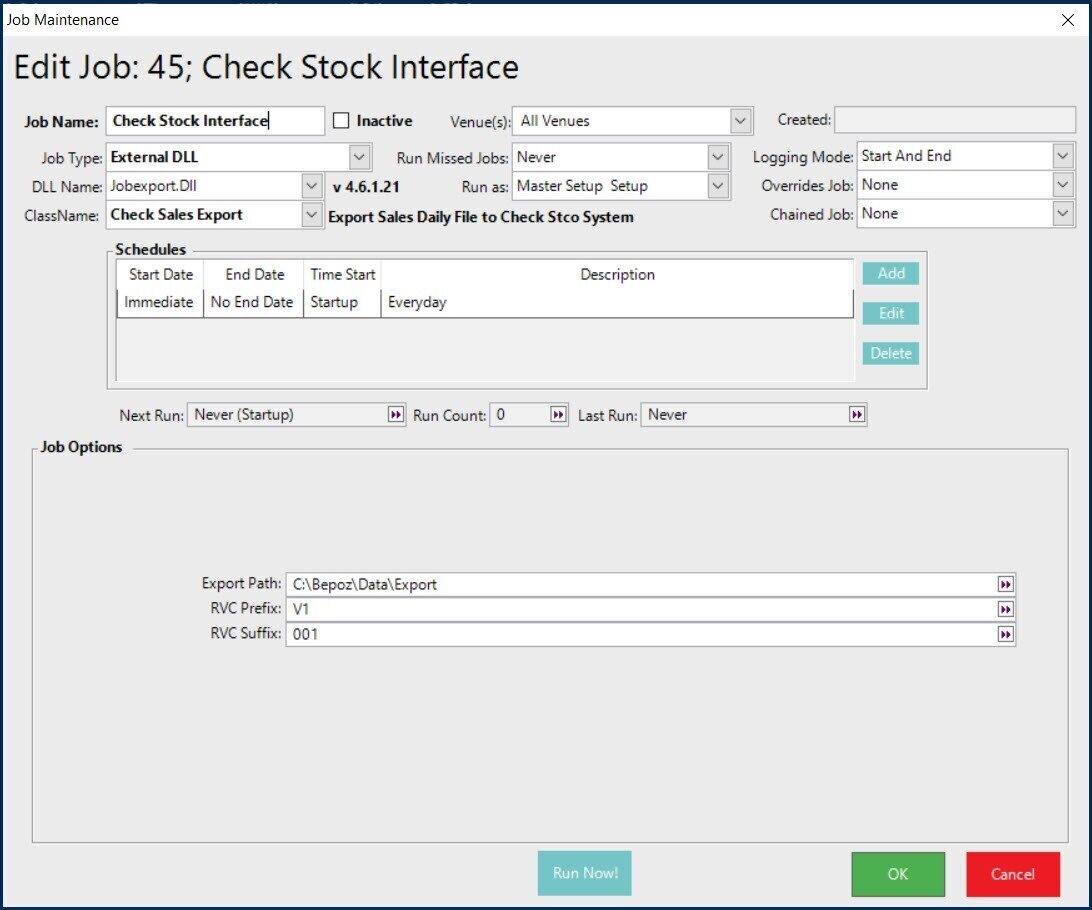
- Please see the image and setup notes below for instructions:

Scheduled Job Setup Instructions
- After adding a new Scheduled Job, enter a Job Name and then set it as follows:
- Job Type: External DLL
- DLL Name: Jobexport.dll
- Class Name: Check Sales Export
- Set any other required configurations such as "Run Missed Jobs", "Run as", etc.
- Configure the required Schedule(s); again it is recommended to Run this Job at least once per day
- Within the Job Options, enter the Export File Directory where the Sales File will be located
- A different file is created for each Venue as Store sales data is in each file
- The Export Filename should be as follows:
mcDDMMYY.NNN
where
mc = text (RVC Prefix)
DDMMYY = Date of Data
NNN = Sitecode of Venue (padded left with 0 e.g. 001)
- Click OK to save the Job
BackOffice Extension
- There is also a BackOffice Extension that must be added and configured.
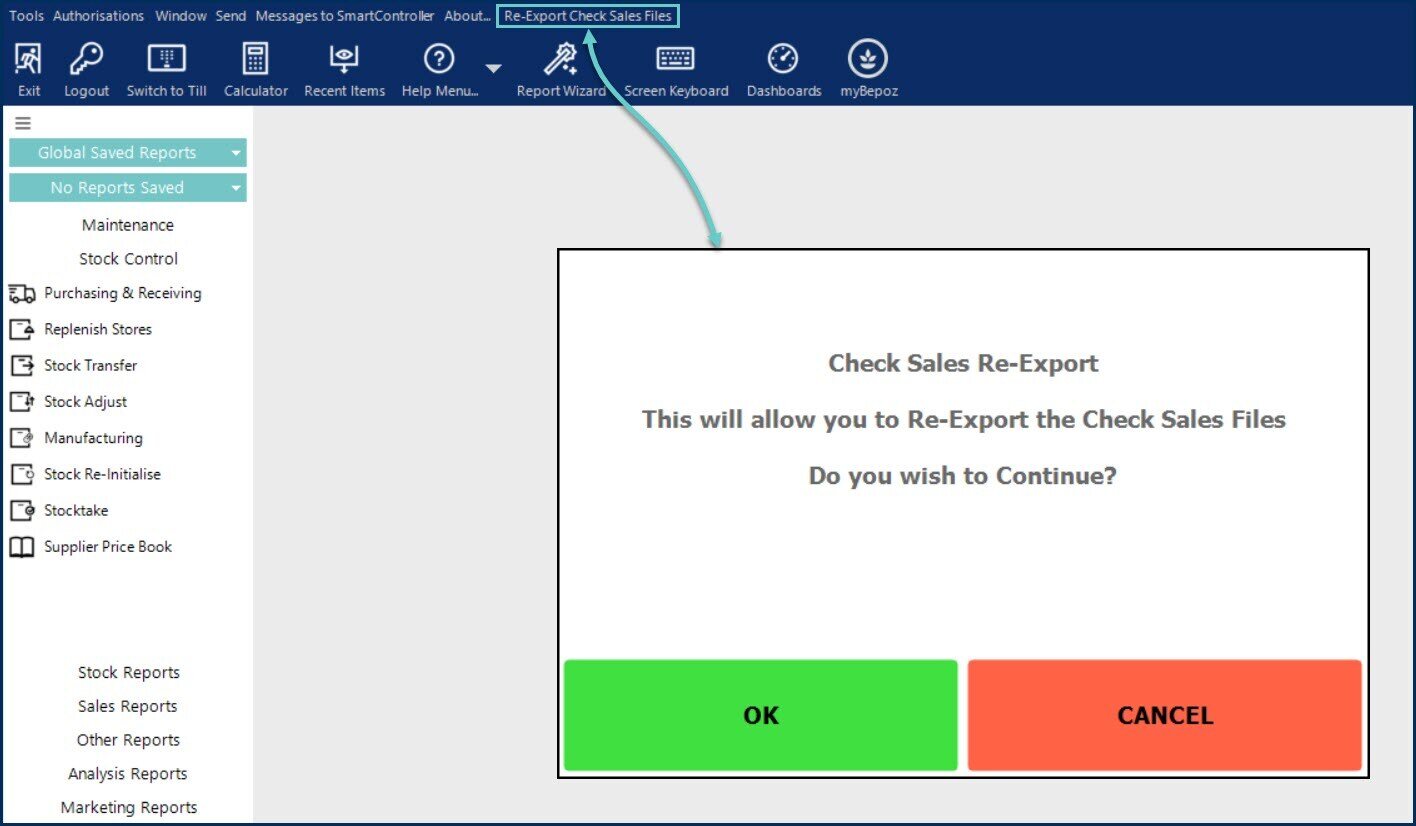
- This will add a new menu option called 'Re-Export Check Sales Files' which will be located in the top menu bar of BackOffice.
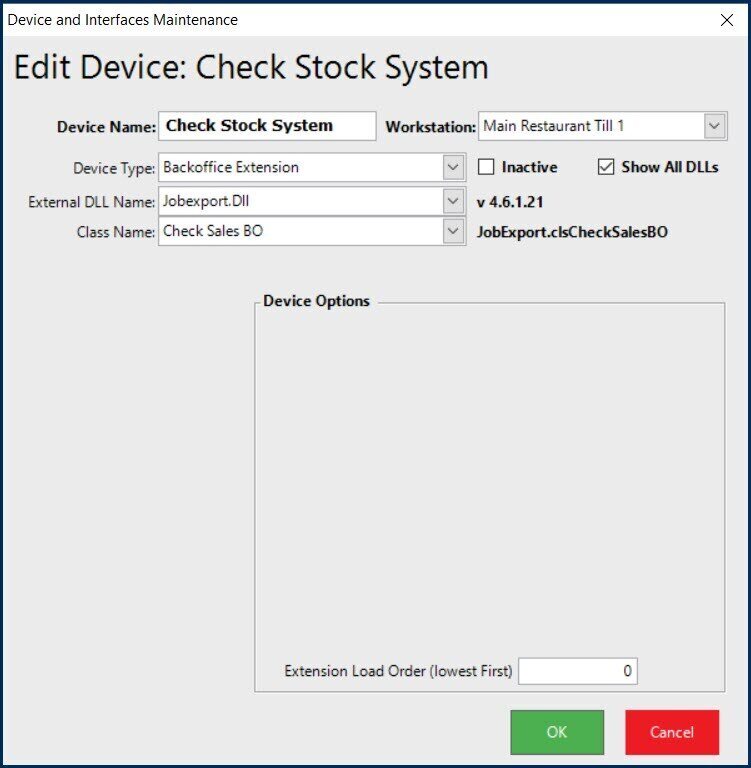
- Please see the image and setup notes below for instructions:

BackOffice Extension Setup Instructions
- After adding a new Device, enter a Device Name and then set it as follows; note that the "Show All DLLs" flag must be turned on):
- Device Type: BackOffice Extension
- External DLL Name: JobExport.Dll
- Class Name: Check Sales BO
- Click OK to save the Device
- Reload BackOffice to update with the 'Re-Export Check Sales Files' option in the menu bar (see below)

