2 | Doshii Integration - Transaction Queue Device Setup
This article covers the Transaction Queue Device setup guide for the Doshii Inte
Prerequisites
- Minimum Bepoz version of v4.7 and onwards
- For an Operator to be able to setup the Doshii Integration, the following Operator privileges must be enabled:
-
Venue Maintenance "Main" Tab (General Settings) - All “System Setup” Flags
-
Operator Maintenance 'General' Tab - System Setup: “Maintain Venue, Stores, Tills” Flag
- System Setup: “Access Venue, Stores, Tills” Flag
Doshii Transaction Queue Device Setup
- After logging into BackOffice, complete the following steps to create & configure a Doshii Transaction Queue:
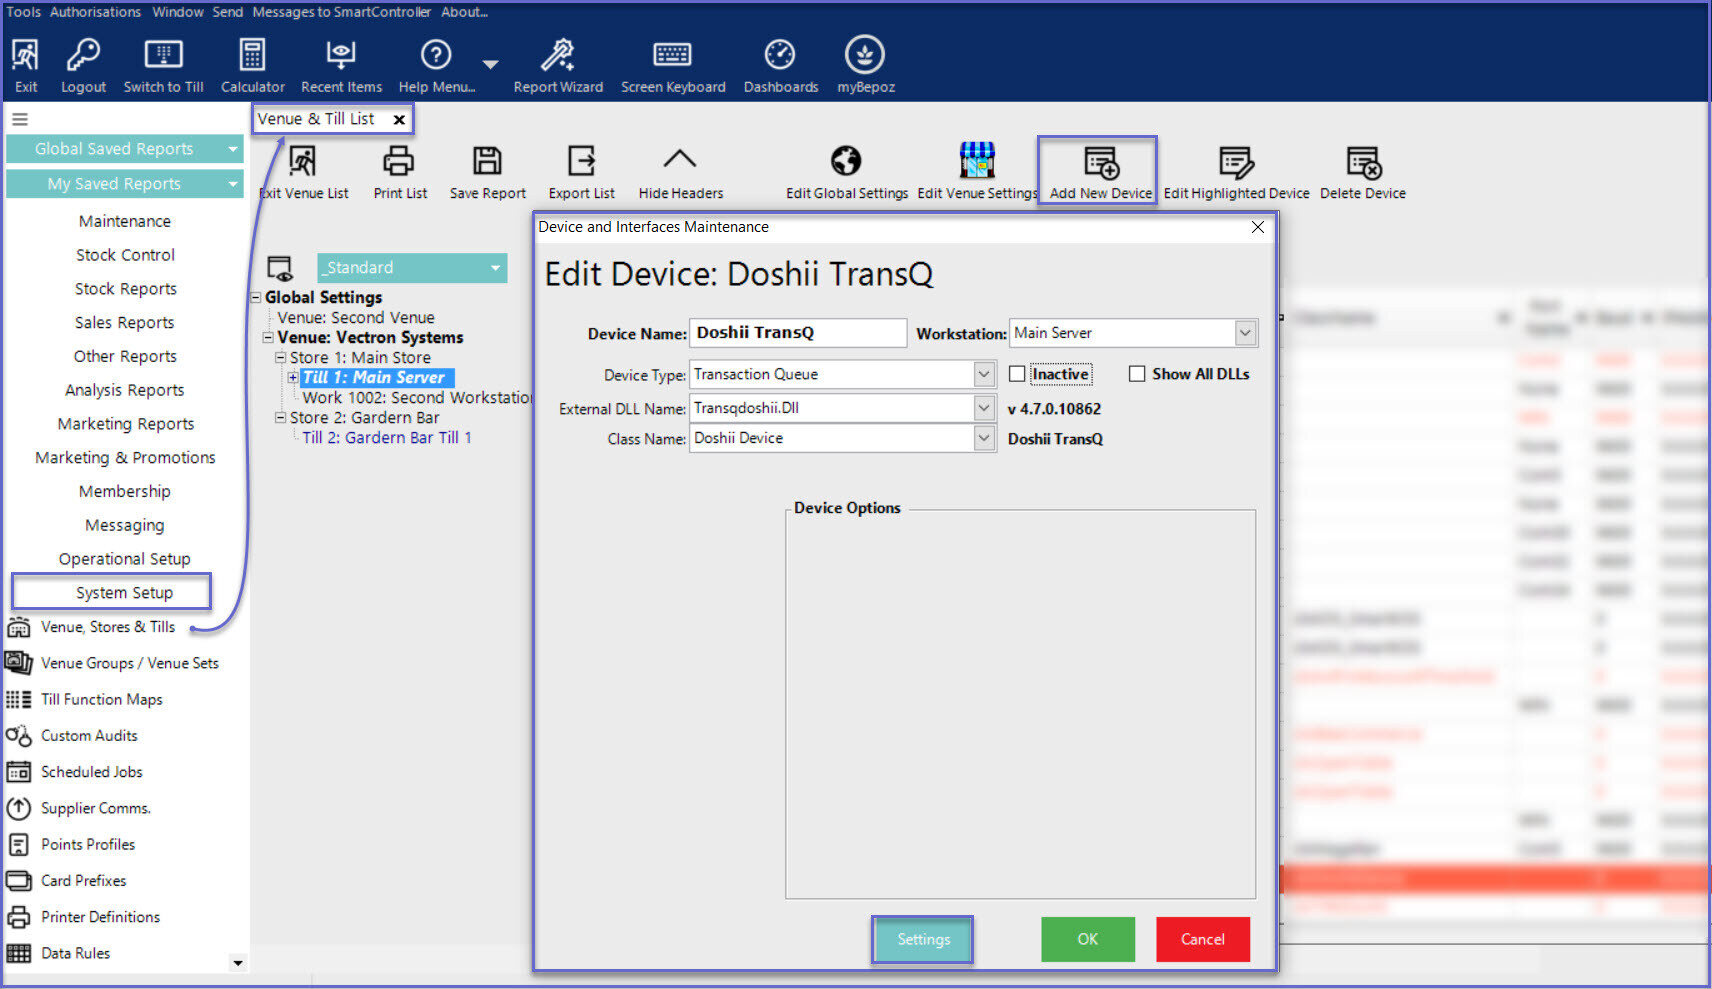
- Navigate to the System Setup component in the sidebar, expand, and select Venue, Stores & Tills to open the Venue & Till List Tab
- Highlight the desired Till and click on the Add New Device button in the header; when prompted select 'Blank Device' and a New Device and Interfaces Maintenance window will open
- Enter a relevant Device Name, set the Device Type to 'Transaction Queue', set the External DLL Name to 'Transqdoshii.Dll', and the Class Name to 'Doshii Device'
- Click the "Settings" button at the bottom of the window which will open a separate "Doshii Settings" window
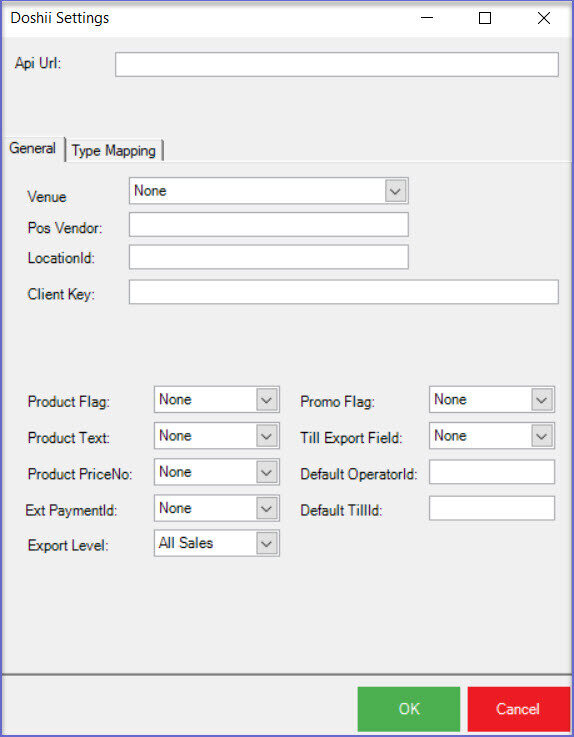
- Within the Settings, configure as follows:
Api Url: This is the Url provided by Doshii. Please click here to know more about the Doshii Environment
General:
- Venue: Select the appropriate Venue from the drop down list
- Pos Vendor: Enter the POS system ID provided by Doshii (Note: The value provided should be in lower case)
- LocationId: This is the location ID provided by Doshii
- Client Key: This is the Client Key provided by Doshii
- Product Flag: This is the custom flag that has been created and set for the Products; only the products with this custom flag will be sent to Doshii
- Product Text: This is the custom text field set on the product
- Product PriceNo: Select the Price Number from the drop down list; the selected Price Number will be used when a menu is sent to Doshii
- External PaymentId:
Create an external payment for Doshii and select the external Payment ID from the drop down list - Export Level: Select which type of transaction data to export from the drop down list
- Promo Flag: This is the custom flag set on a promotion; this indicates whether a promotion should go to Doshii; select one from the drop down list
- Till Export Field: This is the field where Doshii Till ID is stored; select one of the Till Export values from the drop-down list
- Default OperatorId: Enter the default Operator ID that will be used
- Default Till Id: Enter the default Till ID that will be used
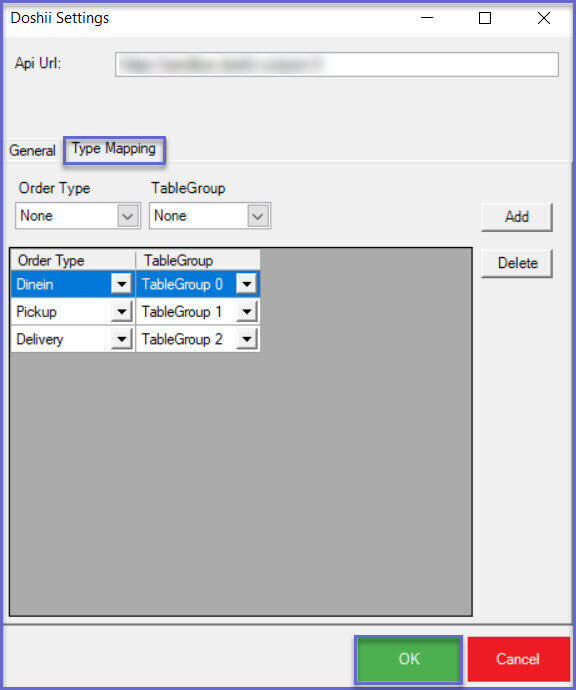
Type Mapping:
1. Map the TableGroup to each Order Type
2. Select the Order Type and Table Group respectively from the drop-down and click on the ‘Add’ button to add the selection
Note: The TableGroup for Doshii Delivery and Pickup order types must be created on the
2.
Click ‘OK’ to save the settings and this will exit from the Doshii Settings window
3. Click on 'OK' again on the Device and Interface Maintenance window to save the Doshii Transaction Queue settings


