Overview
A Package Selection Product is one where it is desired to sell one item at a set price; similar to a Package Fixed Product with Sub-Products added, however, the customer may choose between Sub-Products offered.
An example of a Package Selection Product may be a Combo Meal where the customer can choose between drink options.
Prerequisites
- Operator Privilege to access BackOffice
- Operator Privilege to View Products
- Operator Privilege to Edit Products
Package Selection Product
To create a Package Selection Product:
-
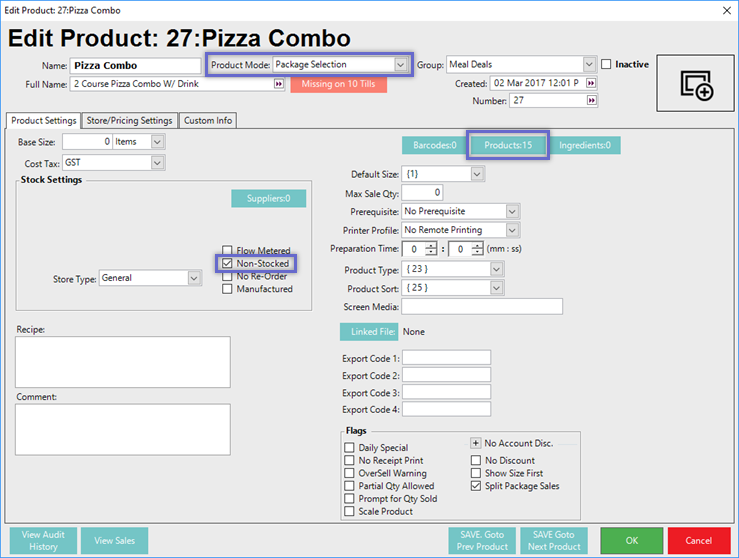
Select Package Selection from the Product Mode drop-down in the Header Section
-
Select Non-Stocked in the Stock Settings on the Product Settings Tab
-
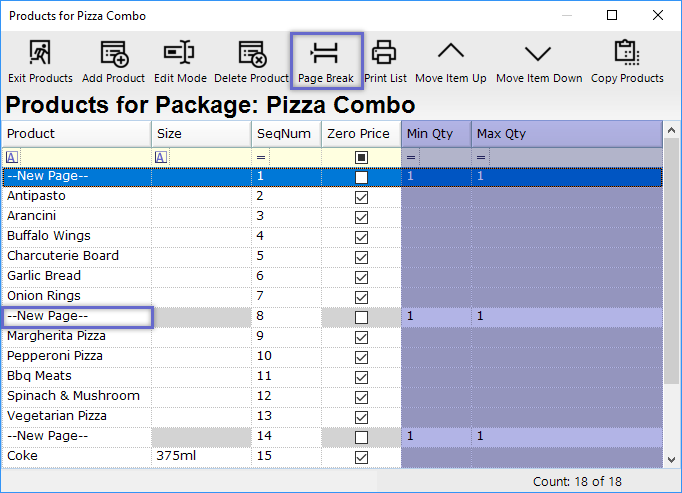
To add Sub-Products, click the Products button on the Product Settings Tab
- This will open a new window for adding, editing, and deleting Sub-Products
-
New Pages will need to be added to separate each set of Sub-Products; do this by clicking the Page Break button
-
Each set of Sub-Products will be distinguished by the "--New Page--" line above it; you can edit the "--New Page--" text by tapping the 'Edit Mode' in the Header - this will show on the individual selection pages at the POS
-
For each Page, a Min Qty and a Max Qty must be entered
-
This will prompt the Operator at SmartPOS to make selections based on those parameters
-
In this example, the Operator will be prompted to select one (1) Sub-Product from each Page because the Min Qty and Max Qty are both set to "1"
-
-
-
Make sure to enable Zero Price for the Condiment Items that are added
-
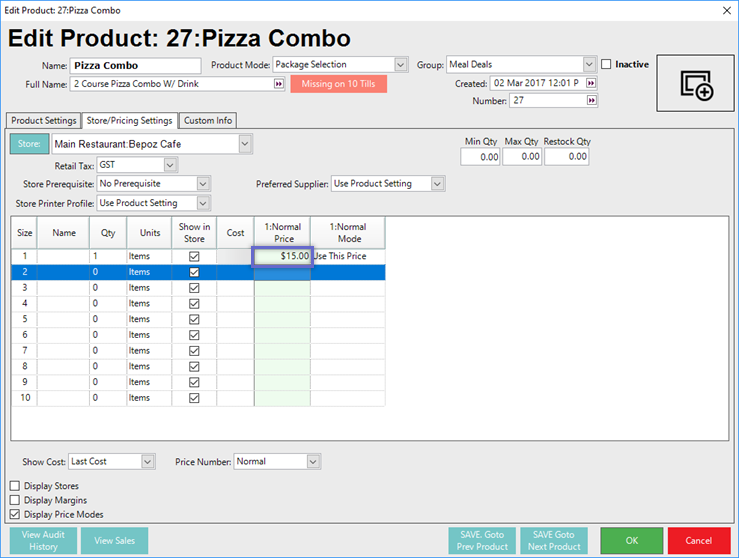
Enter a Price for the Package Selection Product on the Store/Price Settings Tab
"Product Settings" Tab
"Store/Pricing Settings" Tab