Overview
The Replenish Stores function enables creating an Automatic Restock for a Store.
The transfer quantities can be edited, printed, and then the Stock can be transferred from a central Store; e.g., a cellar or warehouse.
There are four ways the transfer quantity can be calculated: Min/Max, To Min, To Max, and Use Sales Data.
Prerequisites
- Bepoz can only be set up to use either the Requisitions or Replenish Stores feature
- To have access to the Replenish Store feature turned on, the following flags will need to be DISABLED
- Global Settings "Flags" Tab
- Purchasing Options: "Use Requisitions" Flag
- Operator Maintenance 'General' Tab
- General Settings: "Use BackOffice Compact Mode" Flag
- To access Replenish Store Features, the applicable Operator Privileges will need to be ENABLED:
- Operator Maintenance 'Stock Control' Tab
- All "Transfer & Adjustments" Flags
- Operator Maintenance 'General' Tab
- System Setup: "Access Venue Stores and Tills" Flag
- System Setup: "Maintain Venue Stores and Tills" Flag
- System Setup: "Maintain Global Settings" Flag
Re-Order Calculation Methods
Min/Max
- Each Product has a Minimum Quantity, Maximum Quantity, and Restock Quantity setting for each Store
- With this option, if the Quantity On Hand of a Product is below the Minimum Quantity, it will be restocked up to the Maximum Quantity, in multiples of the Restock Quantity
- This option generates a Restock Quantity that will bring the stock level up to the Minimum Quantity setting in the receiving Store
- This option generates a Restock Quantity that will bring the stock level up to the Maximum Quantity setting in the receiving Store
Use Sales Data
- This option sets the Restock Quantity to the Quantity Sold in the selected Store, for the selected period
Step-By-Step Guide
After running BackOffice and logging in, follow the steps below to process a Store Replenishment:- From the Stock Control menu, select Replenish Stores
- From the Store drop-down, select the Store to Restock
- Select the Re-order Calculation Mode to be used
- Enter a Percentage Adjustment if desired
- From the Display Period drop-down, select Current Shift
- Select the Product Group with the Products to be Restocked
- Click on the Create Transfer button

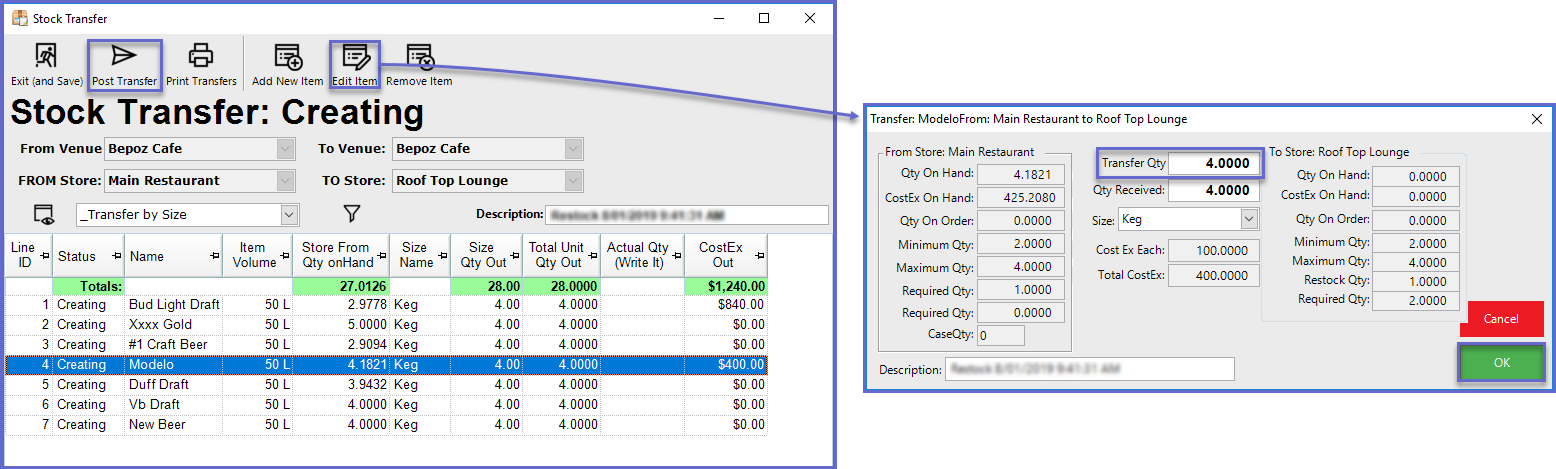
- In the Stock Transfer Window, highlight the desired product and select the Edit Item Function
- In the Transfer Qty Field, input the desired quantity amount and select OK
- Select the Post Transfer button once all desired Transfers have been completed
- Optionally, print the Transfer by selecting the Print Transfer button
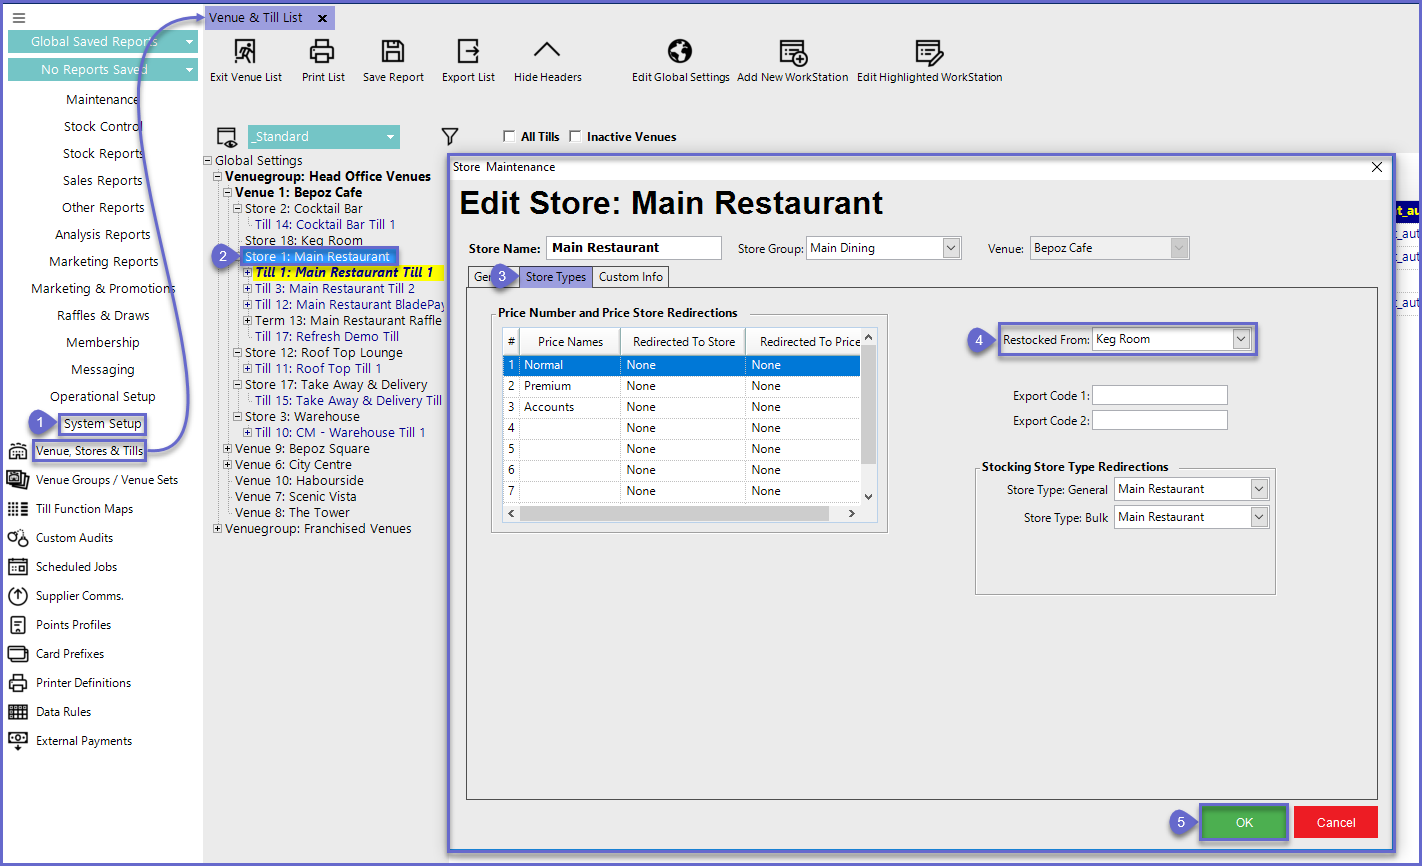
Restocked From
The Store that the Product will be Restocked From is configured within Store Maintenance for the Store being Restocked- To configure these settings, follow the steps below after logging in to BackOffice:
- From the System Setup menu, select Venue, Stores & Tills
- Double Click the desired Store where Products will be restocked from
- In the Store Maintenance window, select the Store Types Tab
- Using the drop-down Menu, select the desired Restocked From Store
- Select OK once completed