Overview
Requisitions offer the capability of creating a Purchase Order for a Store and also the ability to auto-send Purchase Orders.
Requisitions are used for re-ordering ingredients for Manufactured Products.
Requisitions will always use the Preferred Supplier, although if the Preferred Supplier is not selected the first Supplier will be used.
Prerequisites
- To access Requisitions Settings, the applicable Operator Privileges will need to be enabled:
- Operator Maintenance 'Stock Control' Tab
- All "Requisitions" Flags
Setting up Requisitions
- Bepoz can only be set up to use either the Requisitions or Replenish Stores Feature
- To access Requisition features, the "Use Requisitions" flag will need to be enabled within the Global Settings "Flags" Tab
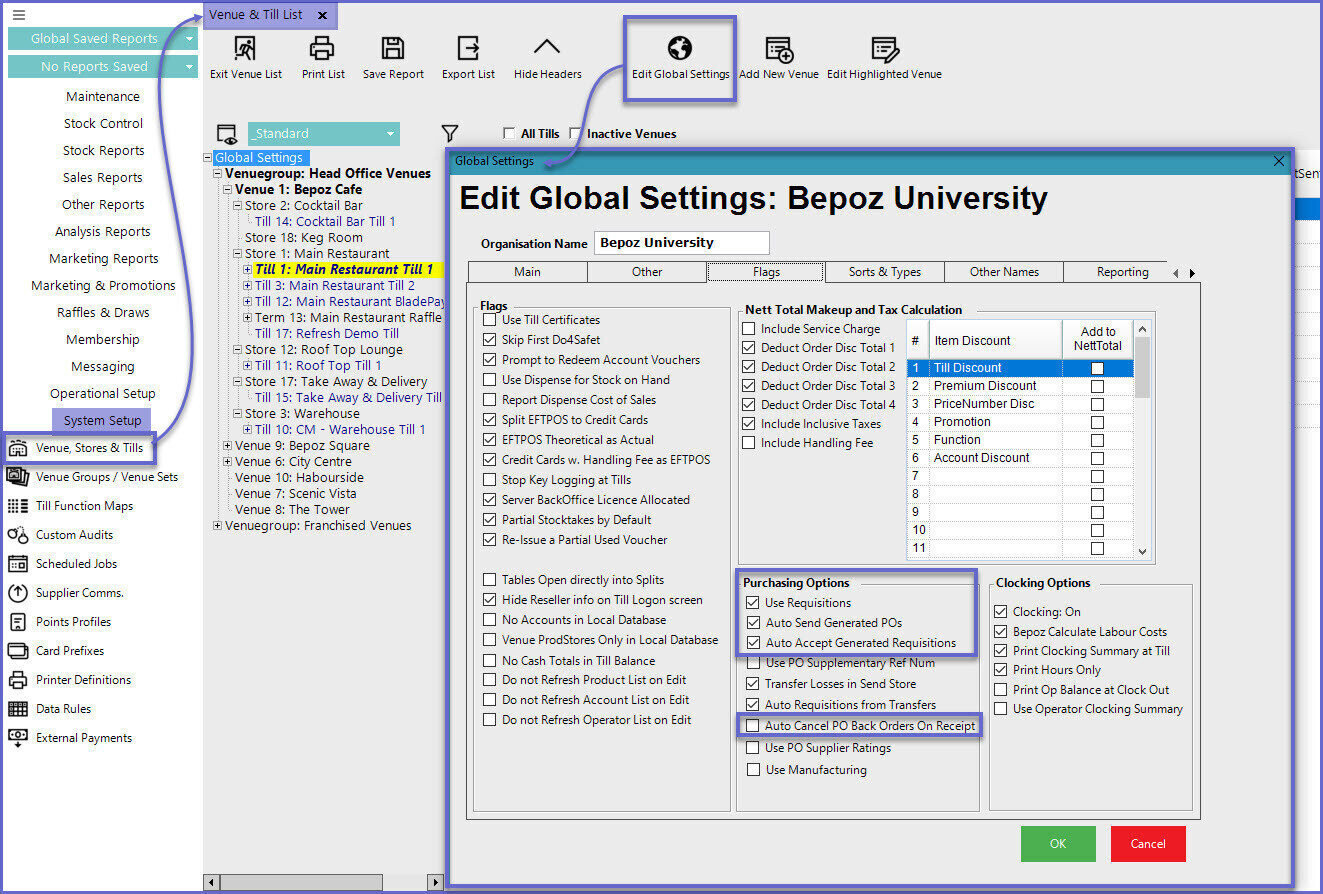
- In addition, there are a number of flags that relate to Requisitions which are detailed in the table below:
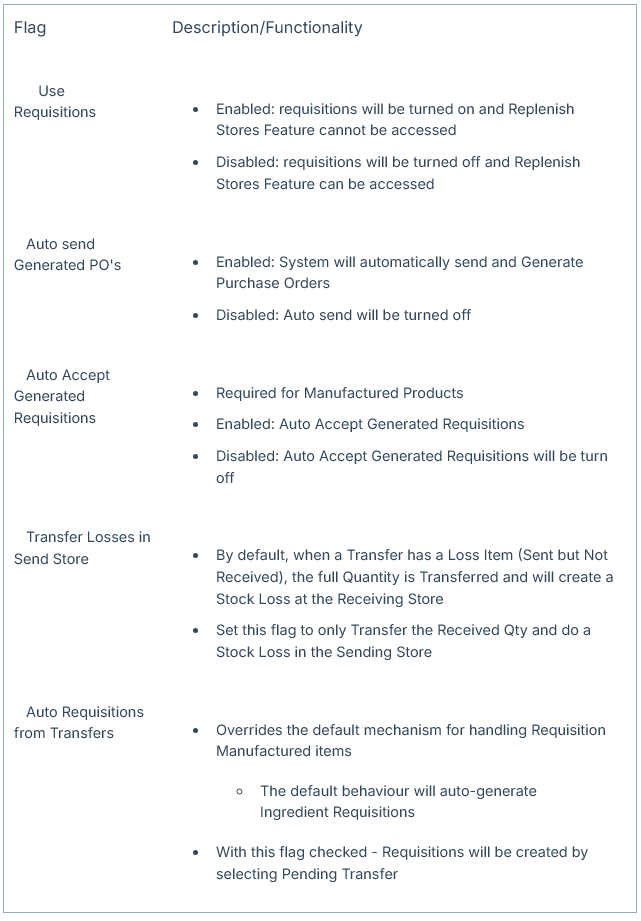
-
Remember, after setting these flags, the Bepoz System will need to be restarted for them to take effect
Assigning Requisition Store Types
- When Requisitioning Stock from Multiple Stocking locations, individual Products can be set to be sourced from different locations
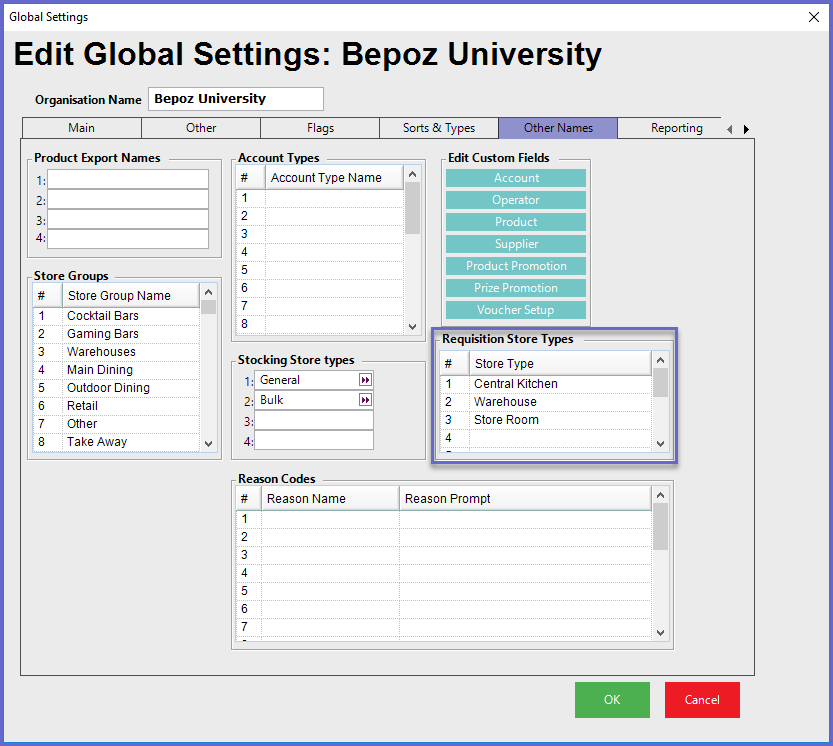
- These source locations can be set within Global Settings "Other Names" Tab
- Up to 8 Requisition Store Types can be setup
- If using Manufactured Products then assign two (2) names to the Requisition Store Types
- If only using normal Stocked Products then only one (1) Requisition Store Type is required
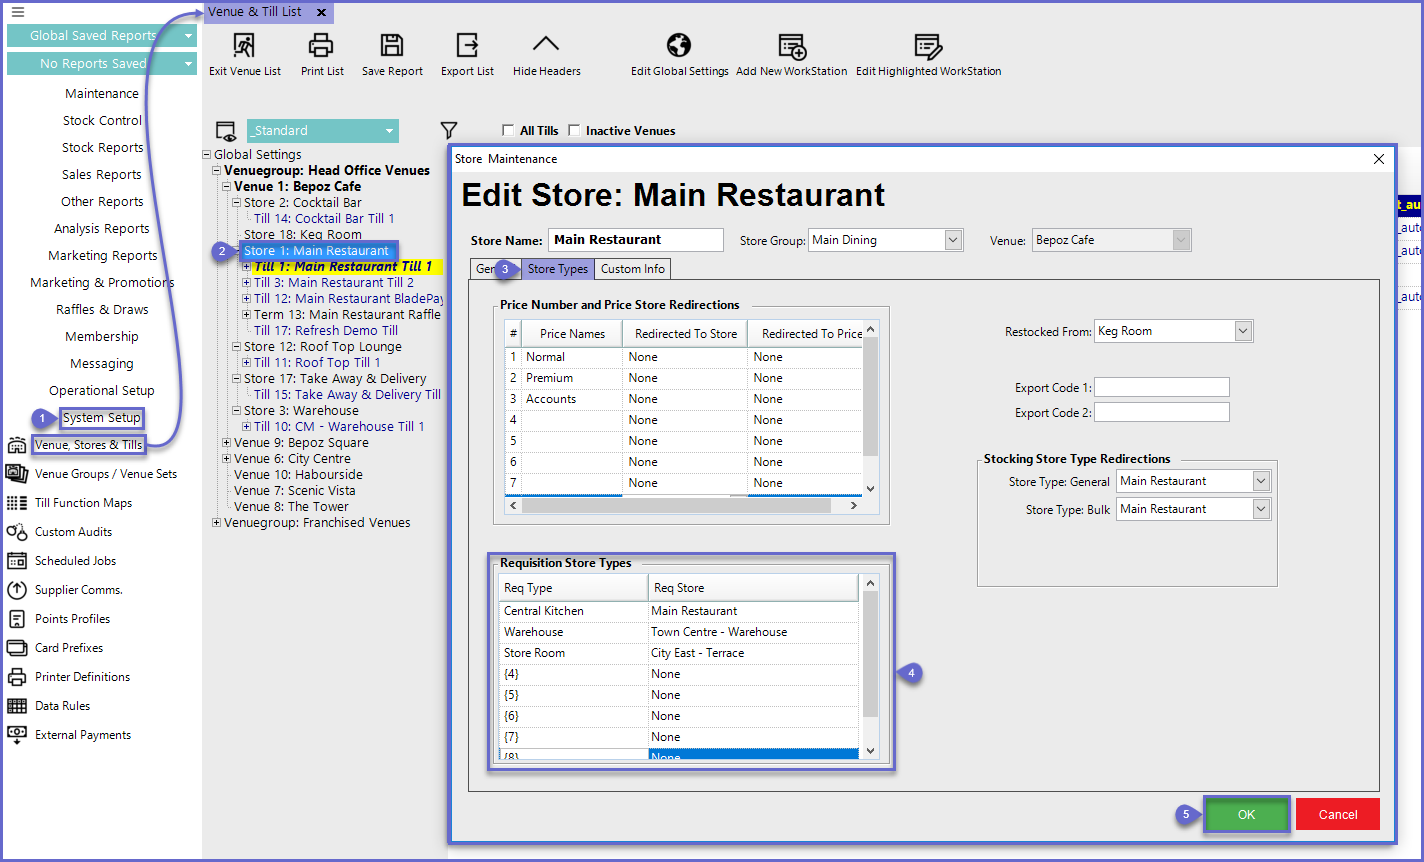
Allocating Store Types: Store Maintenance
-
- From the System Setup menu, select Venue, Stores & Tills
- Double-click the desired Store where Products will be restocked from
- In the Store Maintenance window, select the Store Types Tab
- Assign the Store/s that are required for the Requisition Store Types
- Select OK once completed
- Steps 2-5 will need to be repeated for the Manufacturing Store and the Selling Store
- The Manufacturing Store is where the Manufactured Products are made and will need to be Transferred out from
- If the Venue does not have Manufactured Products – the Manufacturing Store does not need to be setup
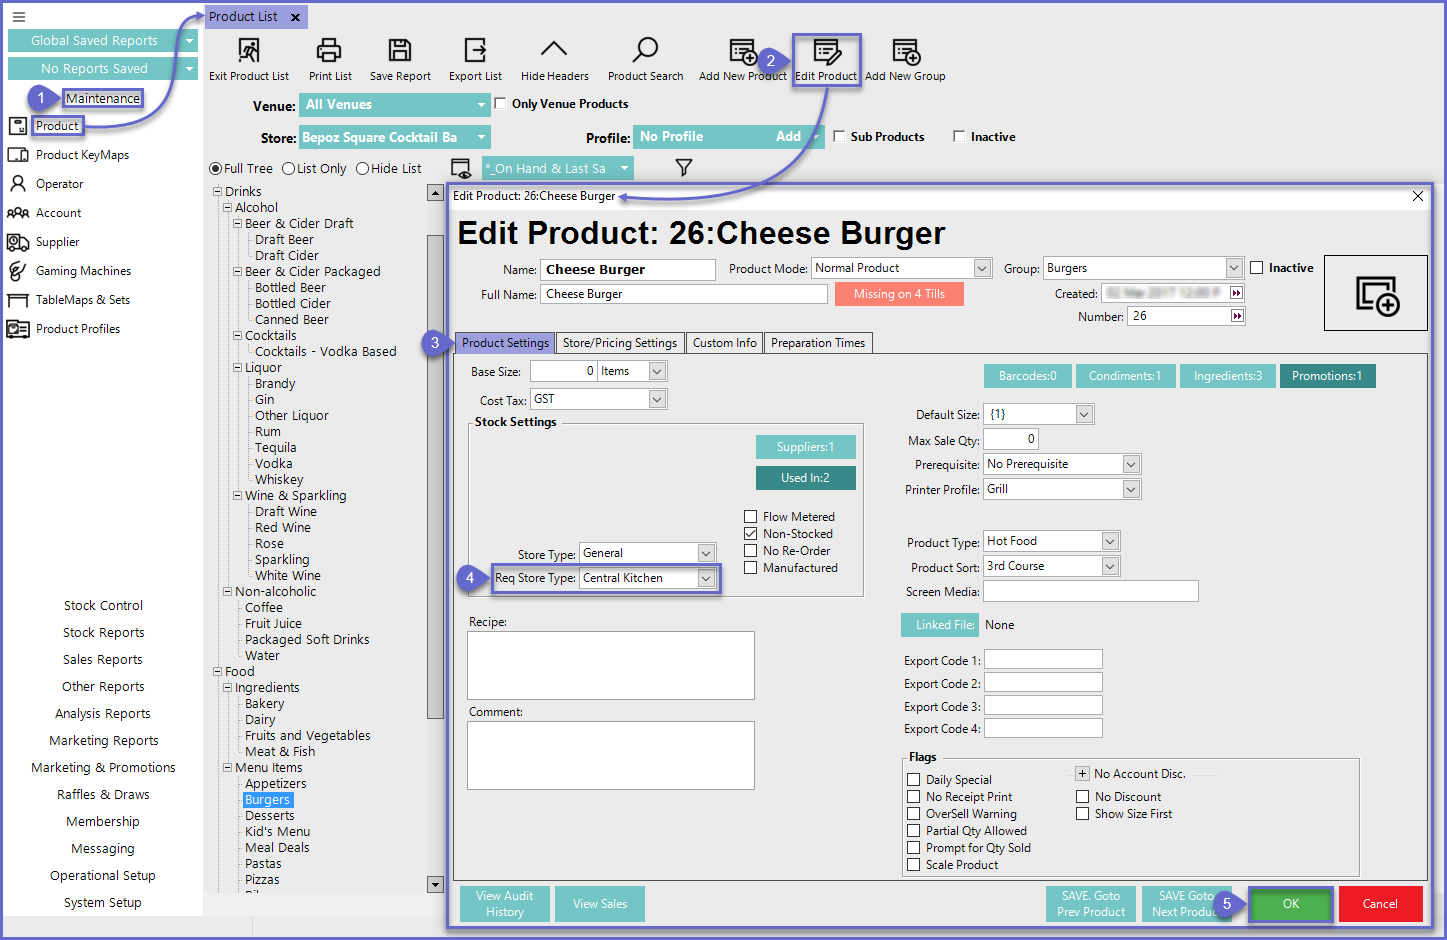
Allocating Store Types: Product Maintenance
- To assign the Requisition Store Types to Products, follow the steps below after logging in to BackOffice:
- From the Maintenance menu, select Product
- Double-click (or use the Edit Product Function) the desired Product will be allocated with a Store Type
- Both Manufactured and Non-Manufactured Products can be selected
- In the Edit Product window, select the Product Settings Tab
- Using the Req Store Type drop-menu to select the desired Store Type
- Select OK once completed
Creating a Requisition
- To begin a new Requisition, first select the Stock Control menu in BackOffice and then Requisitions which will open a new window

- To add a requisition, select the New Requisition button
- A prompt window will appear

-
- Will create a blank Requisition where Products will need to be manually added
-
- Will create a Requisition on the Min/Max setting on the Products that have Min/Max assigned
-
- Will create a Requisition from Sales data
- To create a blank Requisition, select the Blank Requisition button
- This will open up a New Requisition Tab

- Select the Add Item button
- A window prompt will appear with the Product List displaying
- Select a Product that has already been setup for Requisition use

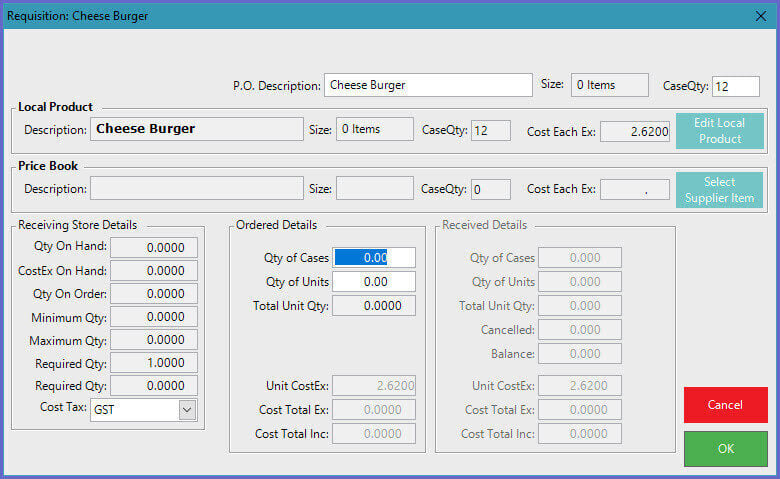
- Another window will prompt to enter the Required order amount
- Enter the Quantity Required
- Follow the previous steps to enter additional Products
- Select the Post Requisition button to finalise
- The Requisition will now be in a Posted status
- Do not Post a Requisition unless certain that the Requisition is completed as once posted the Requisition cannot be amended
Processing a Requisition

-
When a Requisition is in a Posted status, the line item for the Requisition will be displayed in a magenta colour
-
Select the Posted Requisition
-
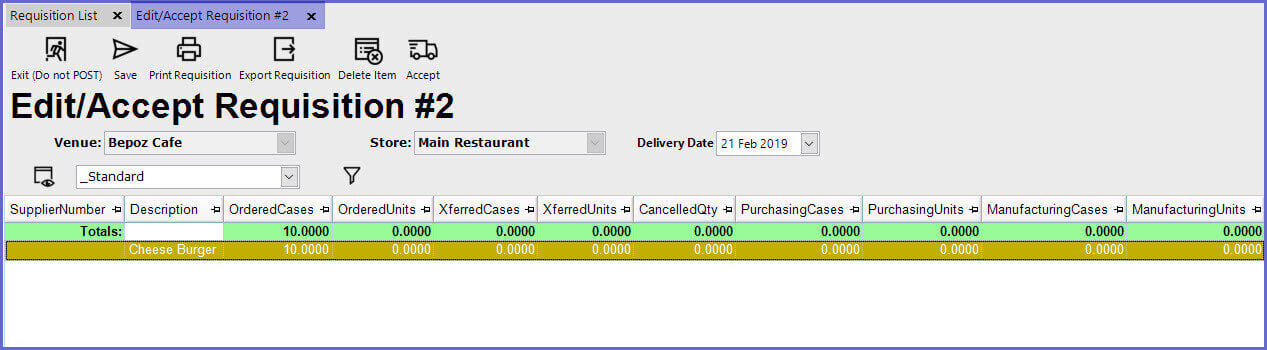
Select the Edit/Accept button which will open a new Edit/Accept Requisition Tab
-
View the details for each Product by double-clicking on the desired line item
-
To process the Requisition select the Accept button

-
Select Yes to continue
-
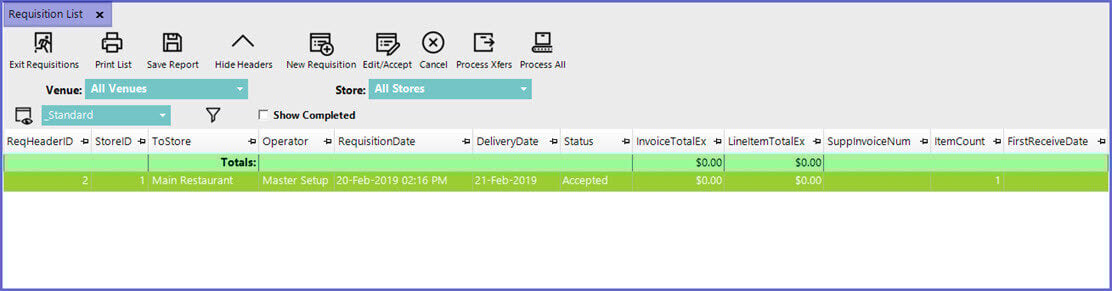
The Requisition List screen will now display the Accepted Requisition in green
-
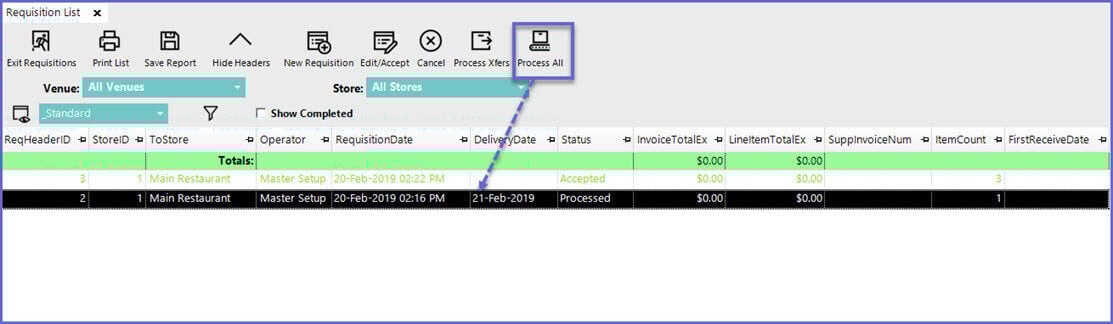
Select the Process All button to Process the Requisition/s
-
Select OK to proceed with Processing the Requisition which will now be successfully Posted
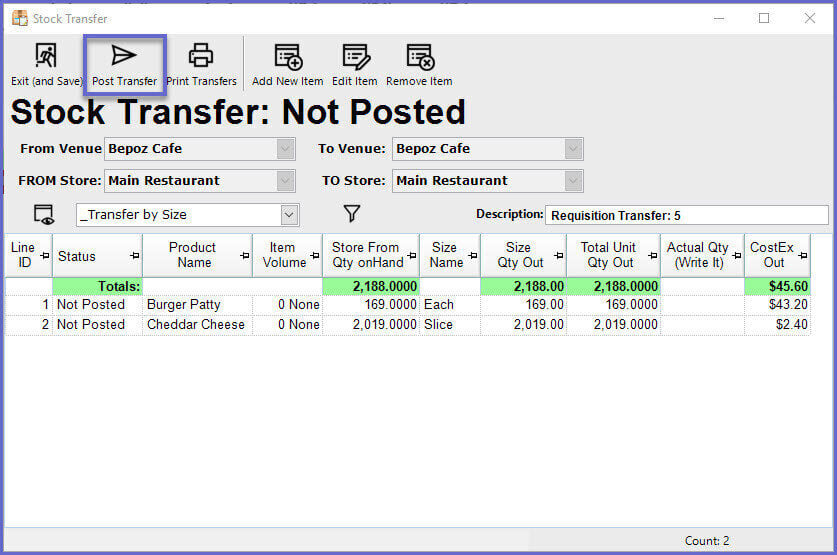
Stock transfer
-
Once Processed, the Requisition has now turned into a Transfer
-
Select Stock Transfer to view the Requisition Transfer

-
Double-click an item from the list which will open a new window
-
Post the Transfers by clicking on the Post Transfer button