Overview
The purpose is to achieve functionality like changing printer profiles and sending down a Venue Database from a button press at SmartPOS.
These Scheduled jobs will also be used to trigger using a custom audit to trigger the Scheduled job at Head Office and then chain a Venue Cloud Database to ensure that changes are sent to the remote sites.
Prerequisites-
Cloud Databases
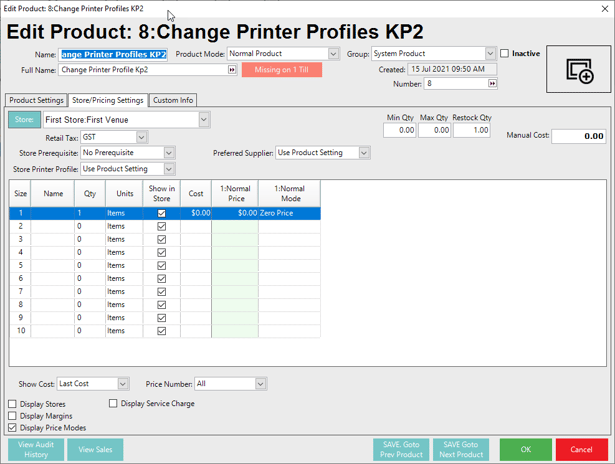
System Products at Zero Price.
In this example, I will be using 2 System products at zero price to Switch Printing profiles on my product base from Printer Profile KP 1 and to have the ability to switch back to the Printer Profile of KP2
-
Create a product for each Schedule Job you want to trigger in this example I will create
-
Change Printer Profiles KP1
-
Change Printer Profiles KP2

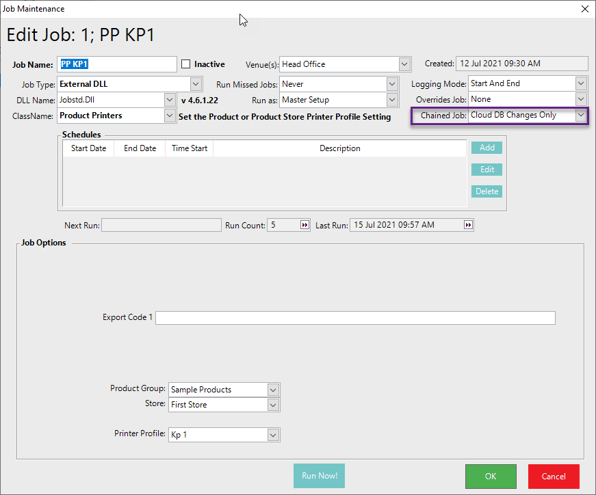
Scheduled Jobs
The next step is to setup the Scheduled jobs you want to trigger from the remote site.
In this example, I will have 3 Scheduled jobs
- To trigger the Switch to Printer Profiles KP1
- To trigger the Switch to Printer Profiles KP2
- A Chain Cloud Venue Database to ensure the changes are filtered down to the remote sites
-
Create Scheduled job for Printer Profile KP1 change
-
Create Scheduled job for Printer Profile KP2 change
-
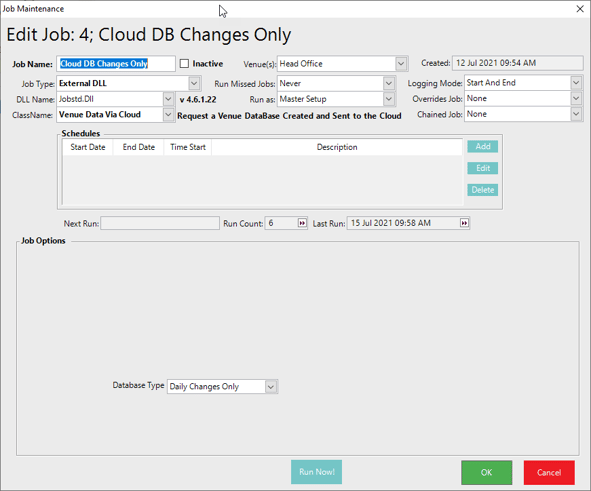
Create Scheduled job for Sending Daily changes only for Cloud Databases and chain the job to KP1 and KP2 Printer profile jobs

Custom Audits
The next step is we need to setup an custom audit in order to trigger an alert to trigger the scheduled jobs to run on the Head Office Smart Controller.
You will have to create a custom audit for each Scheduled job you want to trigger.
In my example, I will have 2 custom audits.
- To Trigger Printer Profiles KP1
- To Trigger Printer Profiles KP2
-
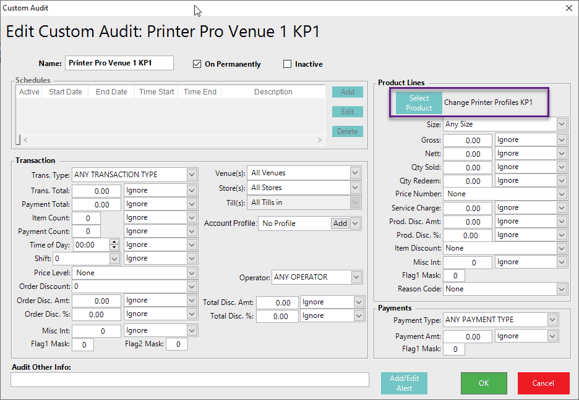
Create Custom Audit Printer Pro Venue 1 KP1 - Specify the System Product
-
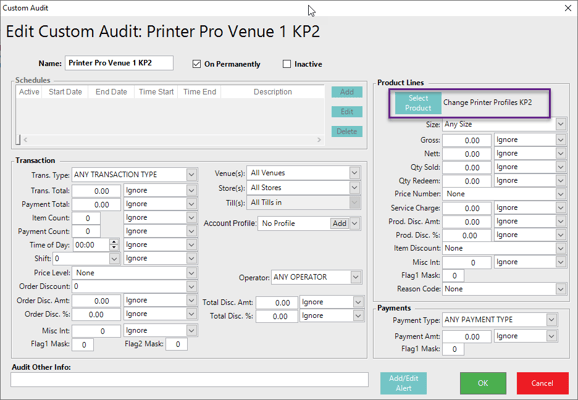
Create Custom Audit Printer Pro Venue 1 KP2 - Specify the System Product
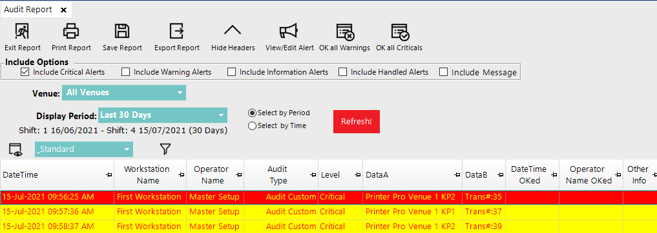
Alerts
You will now create the alerts that will trigger the Scheduled jobs
You will have to create an alert for each scheduled job you want to trigger.
-
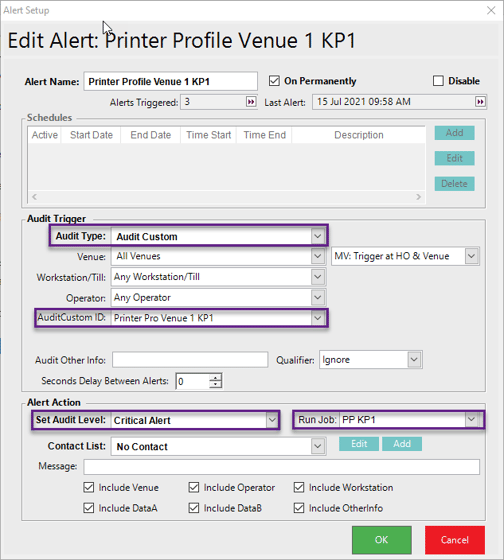
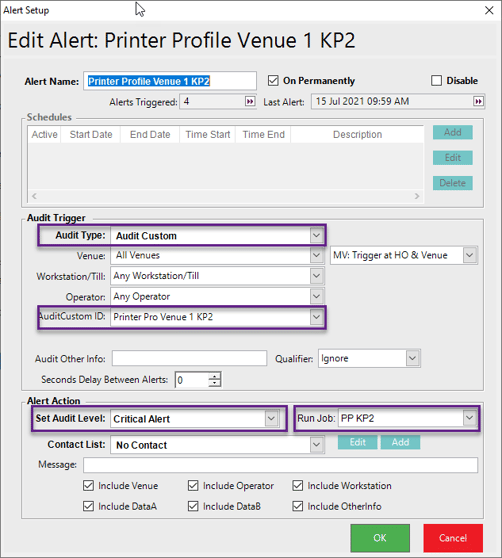
Create Alert Printer Profile Venue 1 KP1
-
Select Audit Custom
-
AuditCustomID will be the Custom Audit you created in the previous step.
-
You can specify the Audit level to information only or warning or critical to ensure you have a visual of the audit triggering.
-
Select the Job you want to trigger.
Function Buttons
You will now assign the System product you created to the function map using the PLU Sales function with "Fixed PLU Auto Cash"
Create two function buttons on the desired panel.
- Change Printer Profiles to KP1
- Change Printer Profiles to KP2


Send Changes to Remote Venue
Ensure the changes are populated to the remote venue.
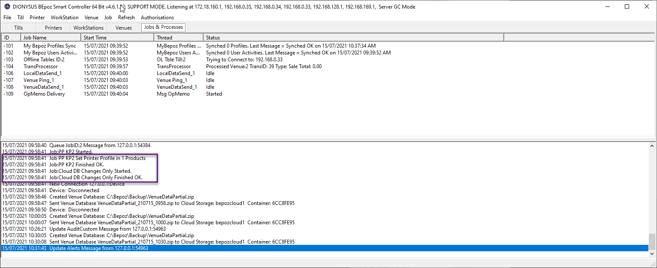
Test using the newly created function buttons
The function button will auto finalize the sale and result in a Scheduled jobs triggering at HO and then chaining into the Venue Cloud send.
Cloud Database are recommend as only the changes will be sent to the remote site resulting in the venue database processing within minutes on the remote site to ensure the changes take effect as fast as possible.