Overview
SmartButton is a type of Loyalty processor application which awards based on sales and this interface sends Sales to a SmartButton receiving port.
Note: This is a custom interface written by an independent customer/organization and may not work on systems other than theirs.
- This Interface is a Transaction Queue DLL, that sends all transactions across to the SmartButton interface
- The data is sent in XML format within a SOAP envelope and is Posted to an internal https URL
Prerequisites
- To access SBLP Settings, the applicable Operator Privileges will need to be enabled
- System Setup: "Access Venue, Stores & Tills" Flag
- System Setup: "Maintain Venue, Stores & Tills" Flag
- Operator Maintenance 'General' Tab
Device Setup
- After logging into BackOffice, complete the following steps to create & configure the SmartButton Transaction Queue device :
- File Contains Full Path Name - Enable this flag when the URL Field is the filename of a text file containing the URL (for really long URLs)
- URL for Upload - Enter the URL here, or alternatively, the filename of a text file containing the URL
- If entering the filename of a text file containing the URL, the "File contains Full Path Name" flag must be enabled
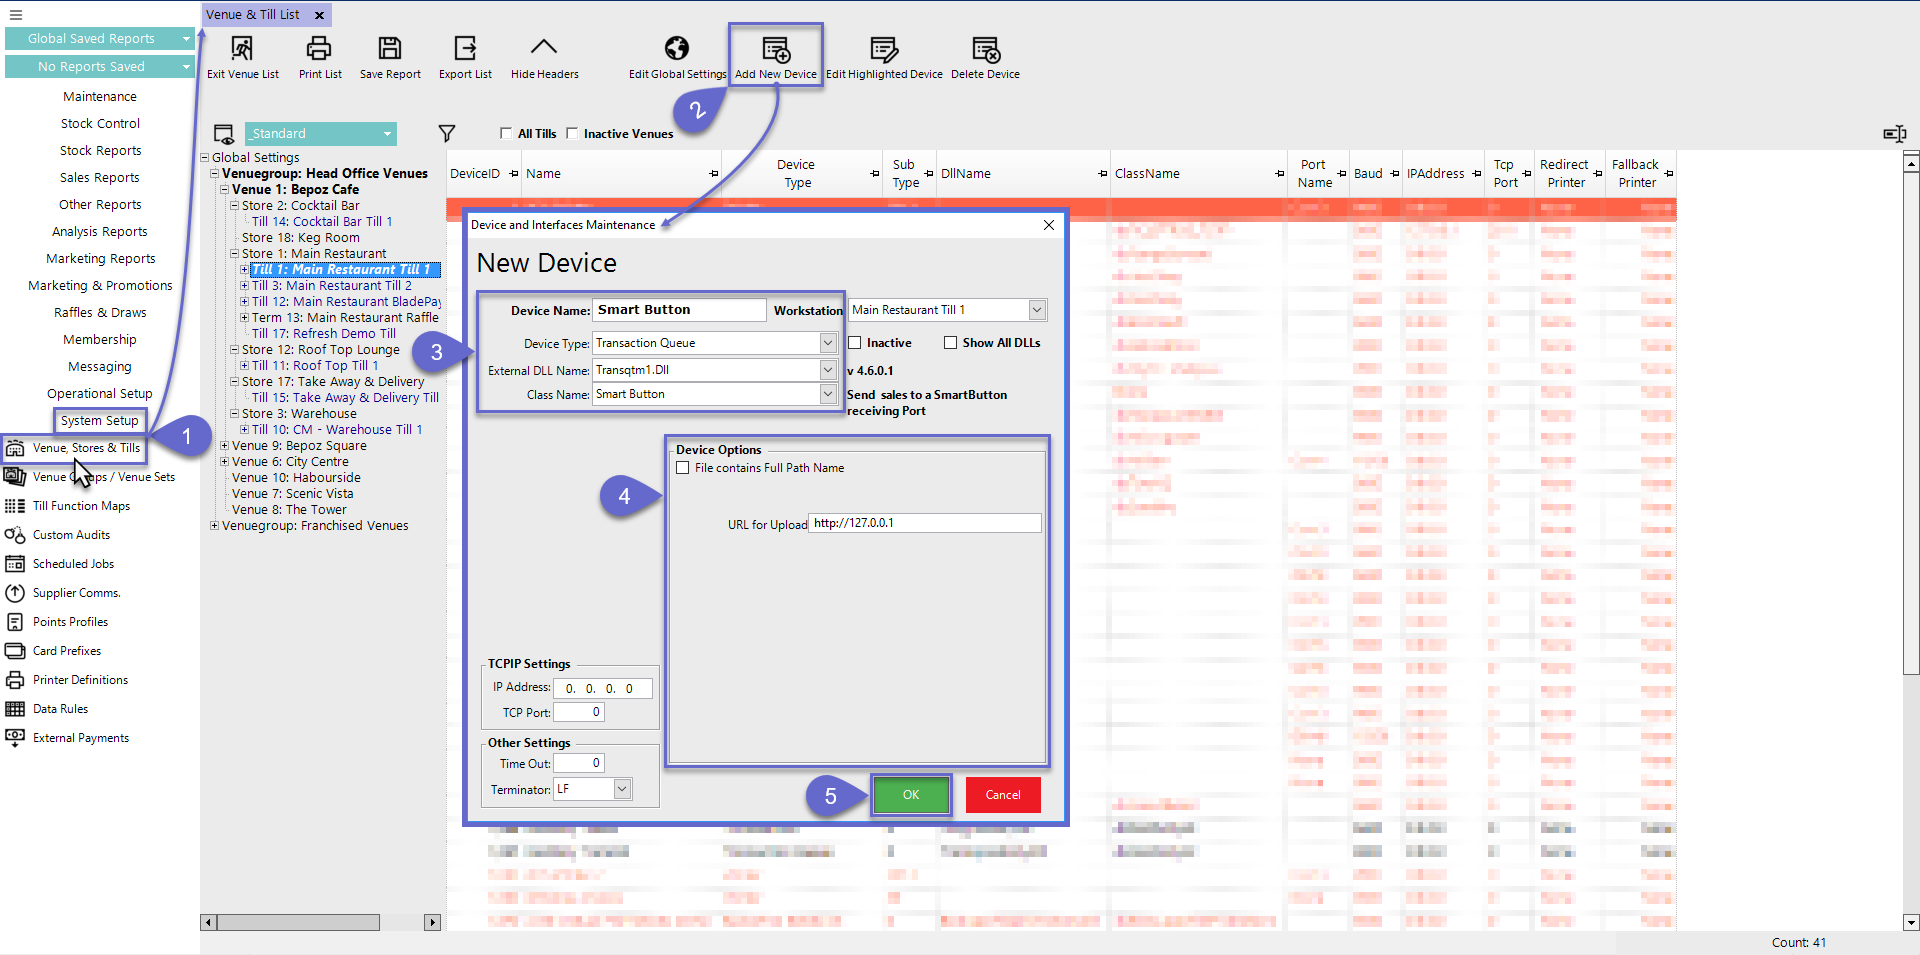
- Navigate to the System Setup component in the sidebar, expand, and select Venue, Stores & Tills to open the Venue & Till List Tab
- Highlight the Head Office Server Workstation and click on the Add New Device button in the header; when prompted select 'Blank Device' and a New Device and Interfaces Maintenance window will open
- Enter a Device Name, set the Device Type to 'Transaction Queue', the External DLL Name to 'Transqtm1.Dll', and the Class Name to 'SmartButton'
- Configure the Device Options as required:
- Click OK to save the Transaction Queue