
Overview
Following on from the Examples in Part 1, We look at how Colours and Images can visually improve a KeyMap design for display on their SmartPOS Workstations.
Prerequisites
- To access KeyMap features, the applicable Operator Privileges will need to be enabled
- Products: "Maintain Keymap Settings" Flag
- Operator Maintenance 'Maintenance' Tab
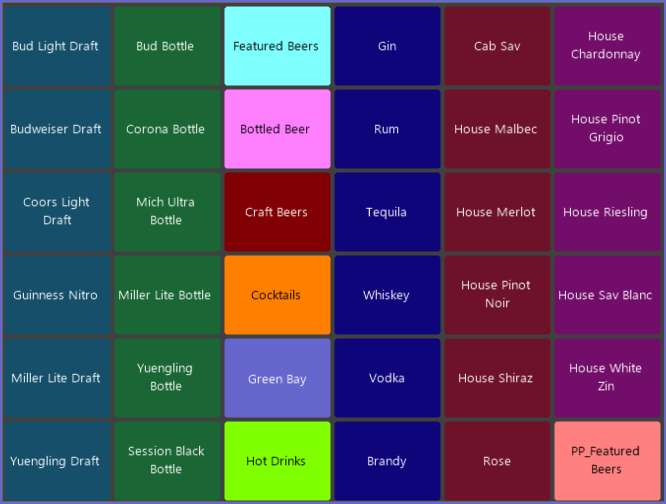
Using Bright Colours
- Using bright, contrasting colors is an easy way to navigate products in the KeyMap
- The colour setting can be configured according to the Organization's preference and can help distinguish the buttons that are used frequently
- While KeyLists may add a screen prompt for the Operator (arguably slowing down transaction time), the added organization of having Products in KeyLists has many advantages
- Operators can copy the color from one key to another by Dragging and Dropping (using the Right mouse button)
- It will duplicate the ForeColour and Back Colour from the original
Adding Images
"A picture is worth a thousand words"
Keymaps can be visually improved by adding Images to the buttons. Examples

There are a number of options when adding images, including sizes, with or without text, layout of the text, etc
Check your design using Layout Mode.

Note: The Coffee/Tea image look stretched as the Product Key image was imported as a 200x100 pixel [single button sized] image and not a 200x200 pixel image for use on a double button.
- Just use a Single Button and test again in Layout Mode.

- Reimport the original Image as a 200x200 pixel sized button (Double) image and link to the 2 Product buttons
- Or Select the better looking Image Scaling from the Image Display Mode options:

- Then test again in Layout Mode

More Examples

- To add an image to a button first select the Key (A) then press the Set Image button (B)

- Highlight and Select the appropriate Image.
- Choose an appropriate Image Display Mode option.

- Choose whether or not Text accompanies the Image

- Save the Keymap
