
Overview
There are many ways in which operators can set up a KeyMap for display on their SmartPOS Workstations, which may include the size of the Workstation Display Screen and the number of available Keys displayed.
This can all be done from the Product KeyMaps section.
Prerequisites
- To access KeyMap features, the applicable Operator Privileges will need to be enabled
- Products: "Maintain Keymap Settings" Flag
- Operator Maintenance 'Maintenance' Tab
KeyMap Examples
In the Example below, the KeyMap displays five (5) different Sizes for each of six (6) different draft beers- This could be a useful KeyMap in a KeySet and quite efficient if the business sells a high volume of these specific Sizes of Products
- There are zero prompts in order to ring in a sale of one these Product/Size combinations in this case, which will (arguably) speed up transaction time

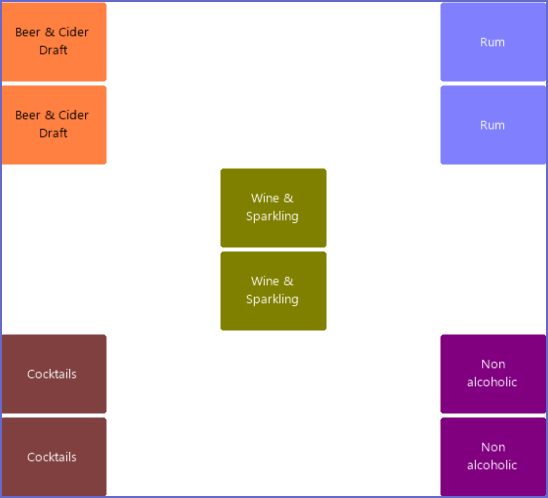
Below is an example of a KeyMap with a combination of the three (3) different Key Types
- This KeyMap has been color-coded to see the different Products, Groups, and KeyLists
- Some Products have essentially been doubled or tripled; this has been done to demonstrate the different button strengths
- In this KeyMap, for all Products that have Size options, the Operator will be prompted to select a Size once the Product Key has been selected

Creating Large Buttons
- The below KeyMap is designed for maintenance; all the Products are displayed in Groups
- This means the KeyMap and KeyLists do not need to be maintained, only the database and the Groups they are in need to be maintained
- For example, if certain Cocktail flavors were added or removed from the menu, the KeyMap would not need to be adjusted; only the group or Products within the Group would need to be maintained in BackOffice
- Putting two (2) of the same keys on top of each other will present as a large button in the SmartPOS Workstation
-
If a Product is removed from the menu, the Inactive flag for the Product can be enabled in Product Settings; it will no longer appear at the SmartPOS Workstation within the Product Group, however, it will still remain in the database for future use .
Layout Mode
Layout Mode is a special mode that allows you to see what the Keymap would look like live and on different POS. Its a method of previewing your designs without needing to check the POS.
This is useful if the KeyMap is going to be used throughout different Stores within the Venue to ensure only Products which should be sold in a particular Store will be available for selection by the Operator at that Store's Workstations.
When viewed in Layout Mode there will be a number of different outcomes depending on which Products have been allocated to which Stores within the Venue.
- Edit Any KeyMap. Example:

- Select your POS from the Till: drop-down (Blue)
- Click the Layout Mode button (Red)

- Click the Layout Mode button to turn off Layout Mode.
Note the Blue Arrow is Pointing to where the Dessert (5pc) KeyMap button should be but it has not appeared.
This is an indication of a problem with the Product when Viewing on the Bepoz Server Till (Orange)
- Check the product is in the Same Store as the Bepoz Server Till, If Not, Add it to the Store and check Layout Mode again.

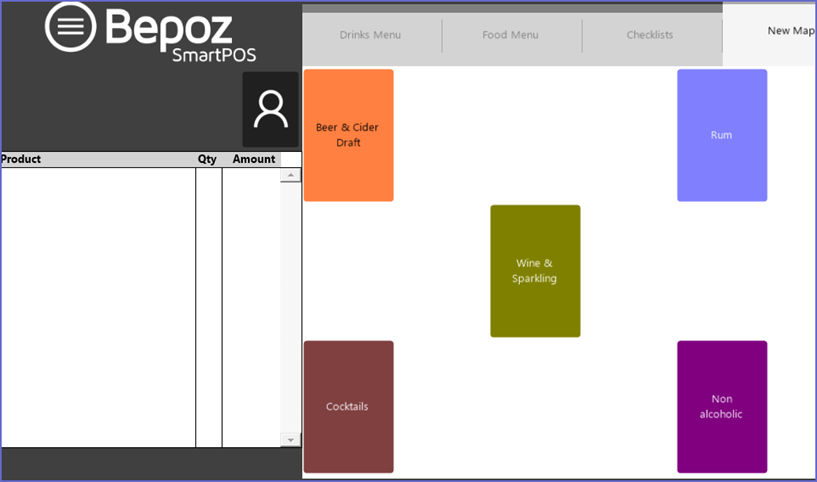
KeyMap Edit View

SmartPOS Workstation Layout View
